Hacking on Mac: How to install Kali Linux on Virtual Box Step by Step 20195 min read
Perhaps many of you want to use more than one operating system at the same time for different purposes (gaming, working, programming, hacking, designing, etc…). Obviously, each operating system has its own strengths. If you have been using Windows or Mac OS but now you’re a little bit curious about Linux and considering install Linux on your device, sure you can install parallelly Kali Linux with your current OS. However, it can be able to lead to many problems when you install 2 OS on your machine and in some cases, it is very frustrating and time-consuming when problems occur. Then, we have an alternative solution which is more handy in some cases when we use a virtual machine. Instead of simultaneously installing 2 parallel systems on your real machine, you’re able to install the OS(s) that you want in the virtual machine. It saves time, easy to install, unlimited the OS that you want and totally isolated with your OS you’re currently using.
In this article, I want to introduce to you “How to install Kali Linux on Virtual Box on MacOS X”.
First, these are two things you need to do:
When you’re done, start the installation by opening VirtualBox
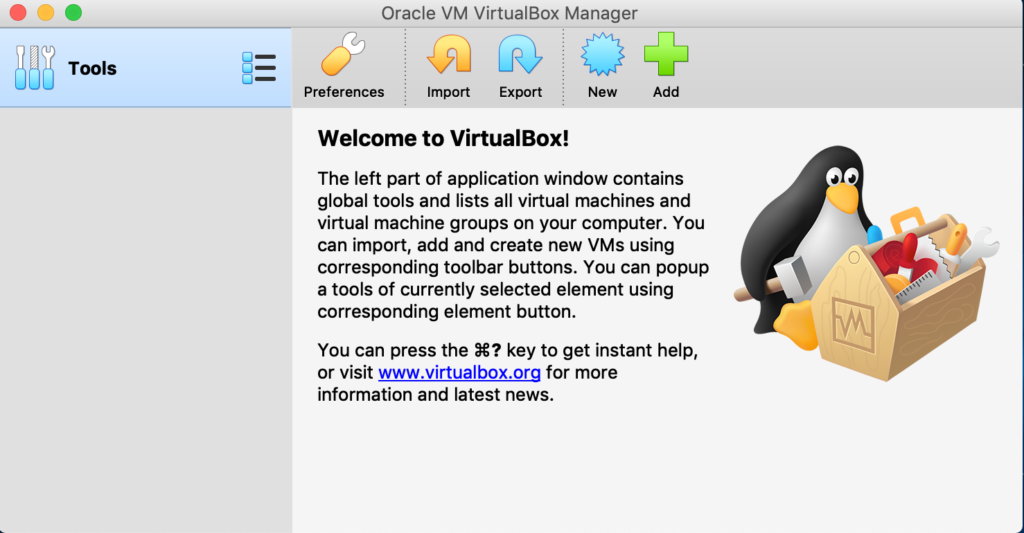
Click to “New button” this window will appear
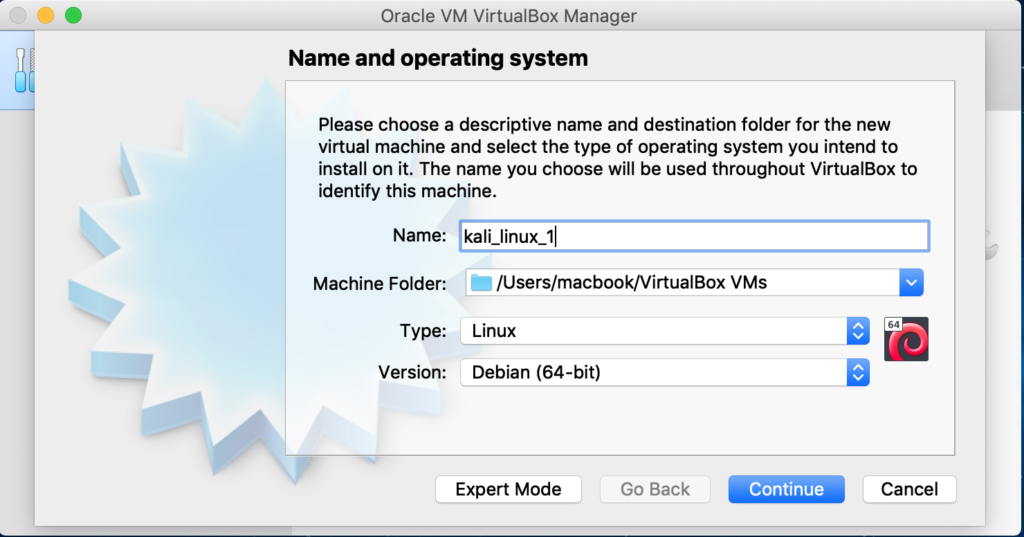
Pick a name and machine folder, the type is “Linux” and version is Debian(64 bit) if you’ve just downloaded Kali Linux 64bit version. Then, press Continue.
Choose your memory size for your virtual machine
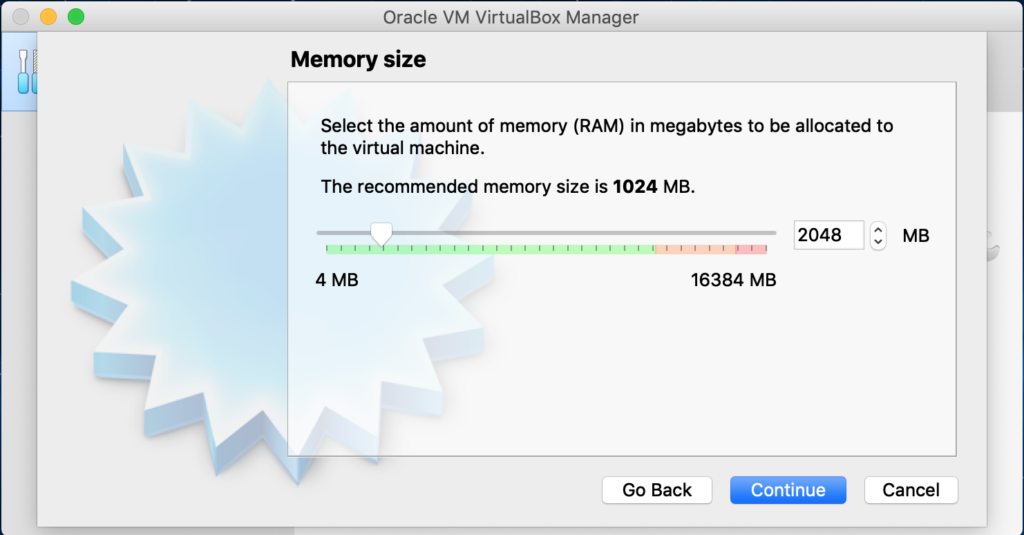
Typically, 1GB RAM is fine for Linux. So I recommend you just choose 1GB is enough then press “continue”.
Tick on “Create a new virtual hard disk now” and press Create
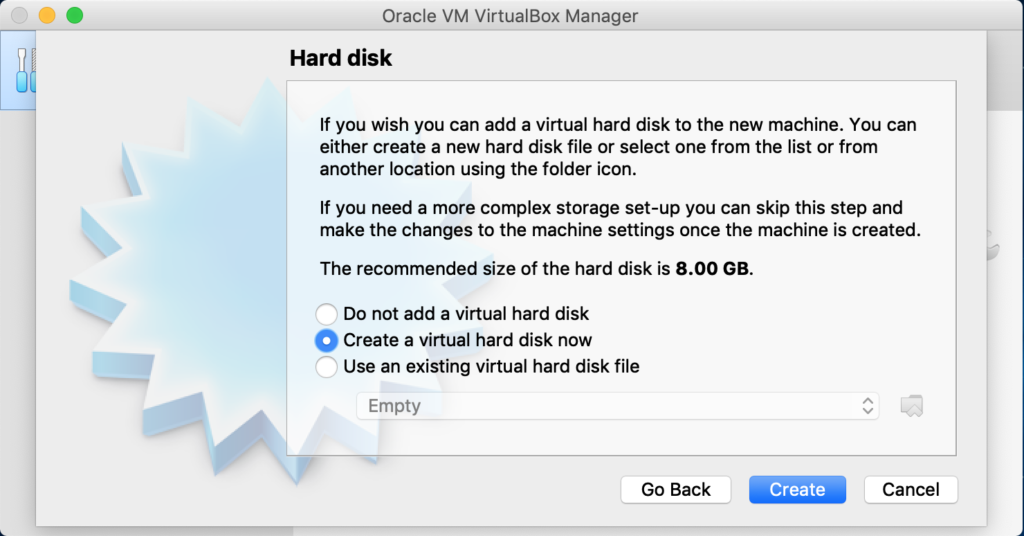
Choose VDI “VirtualBox Disk Image” then press “Continue”
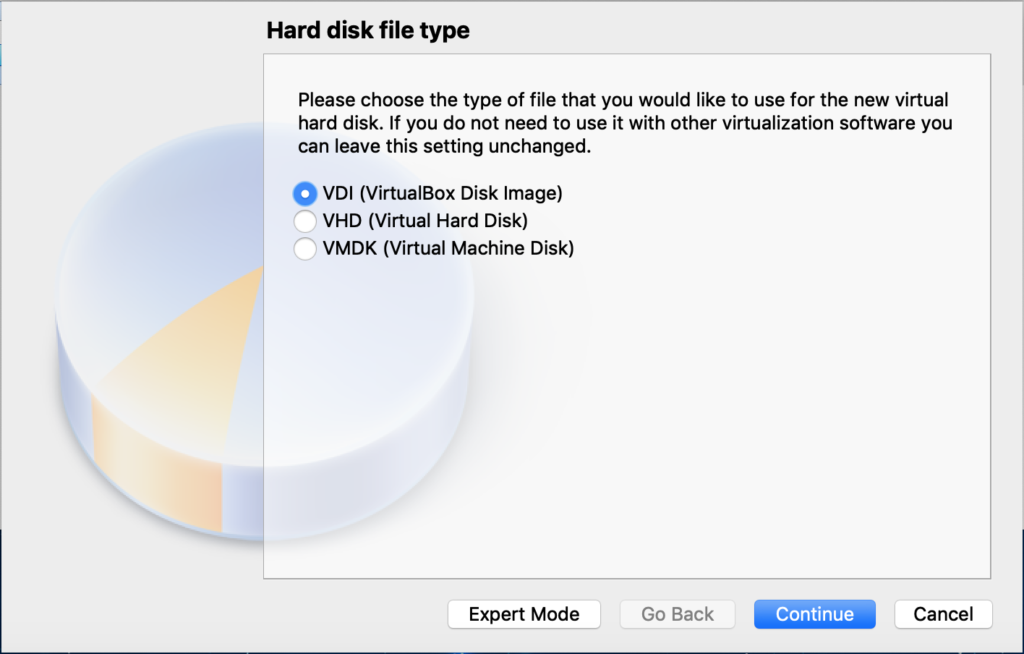
Next, click on “Dynamically Allocated” then press “Continue”
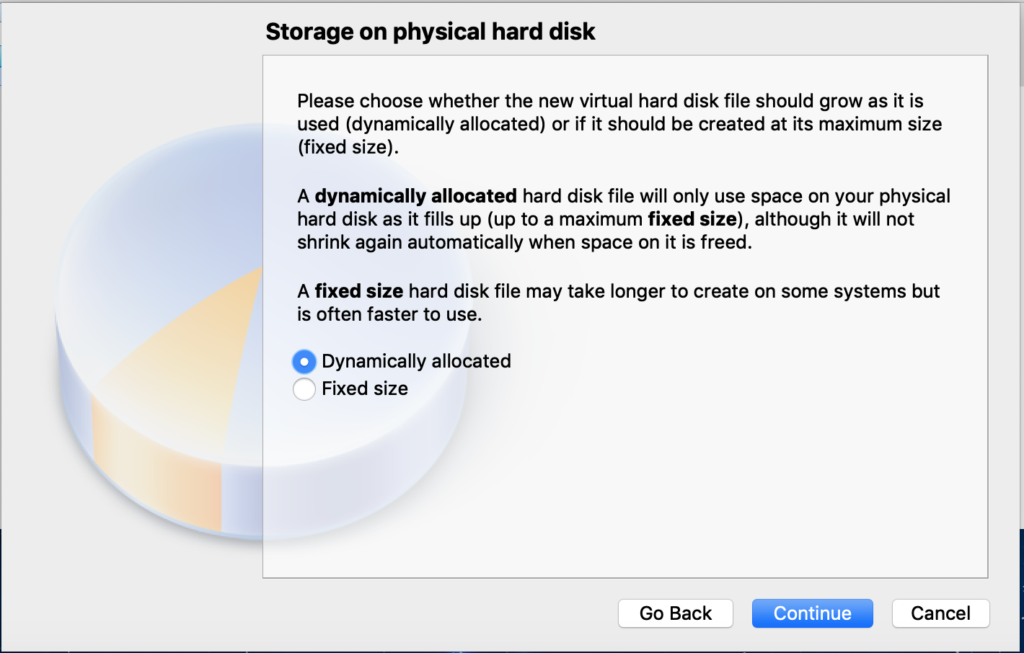
Next, choose file location and size
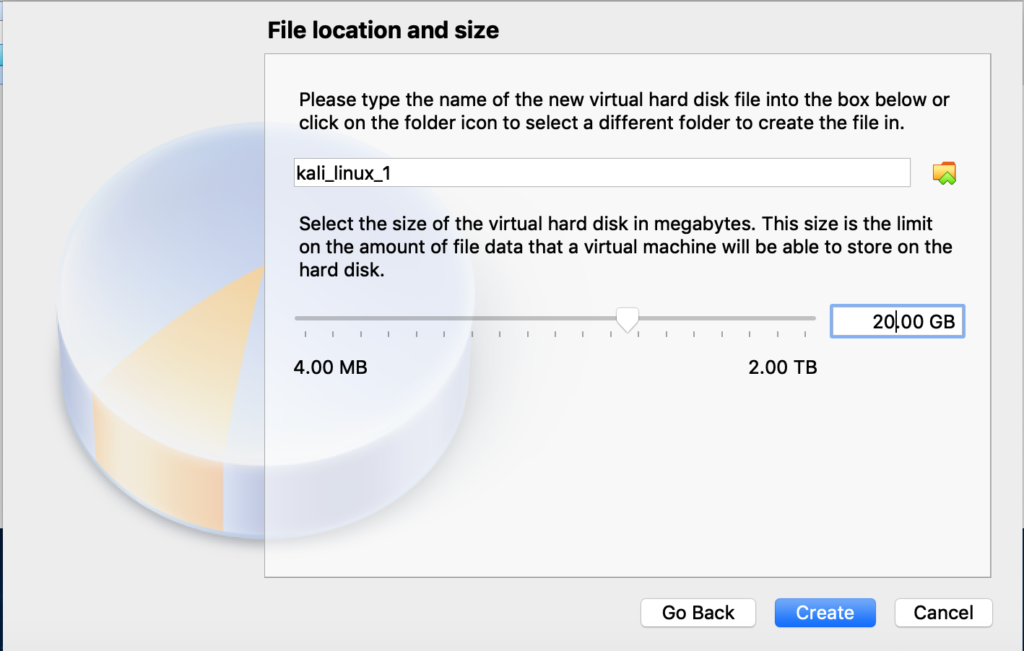
File location is where your virtual machine will be saved in. Default size for the virtual hard disk is 8GB, but I recommend it would be little more, 20GB is good. Then press “Create”.
Almost done, your virtual machine has been created
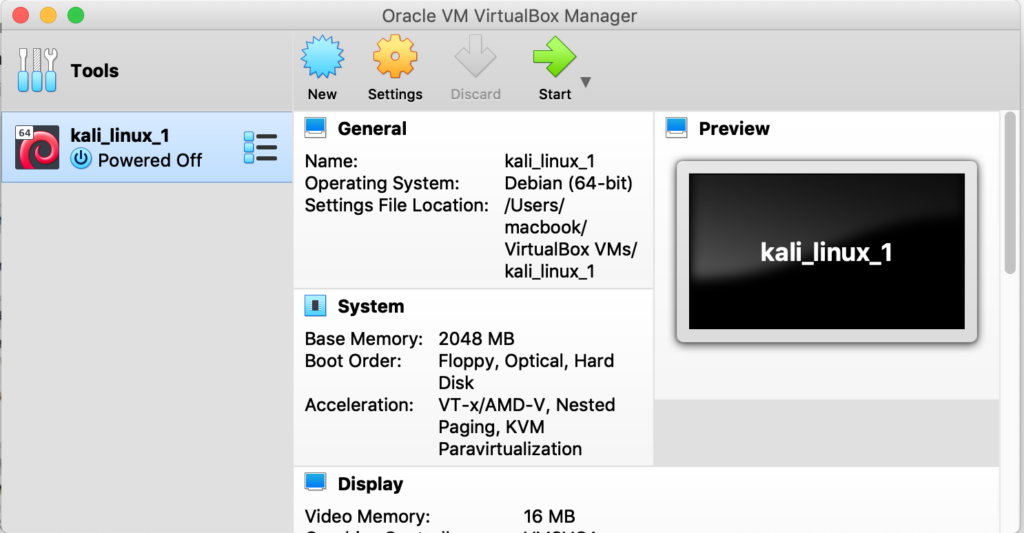
Now, click on the “Settings button” and go to “Storage” category
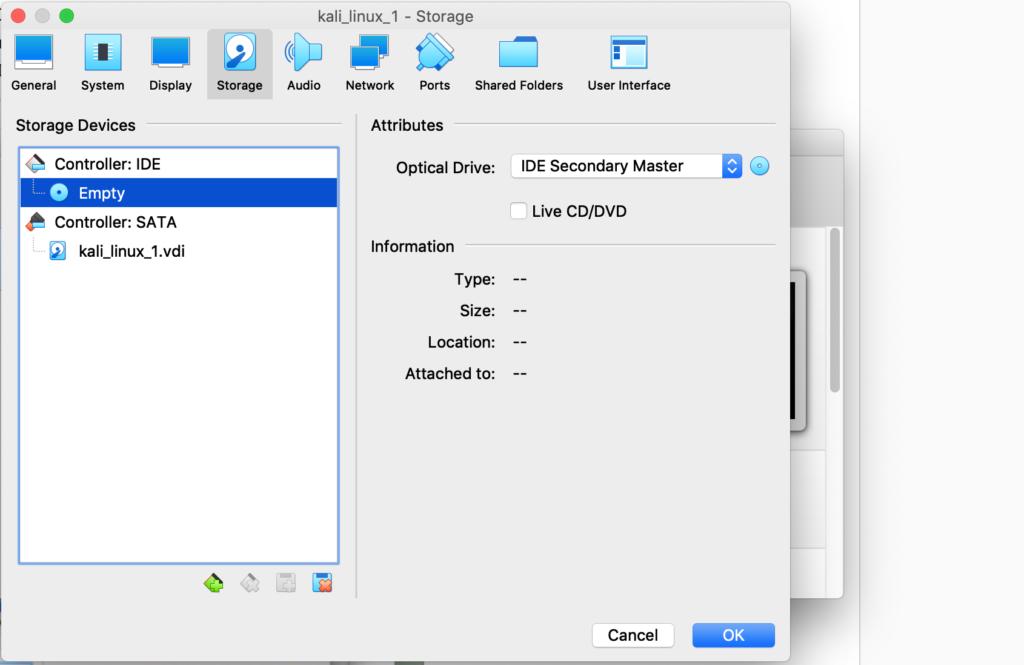
You should see something the same likes this screen.
On “Attributes” section, focus on Optical Drive. Choose the Kali file that you downloaded.
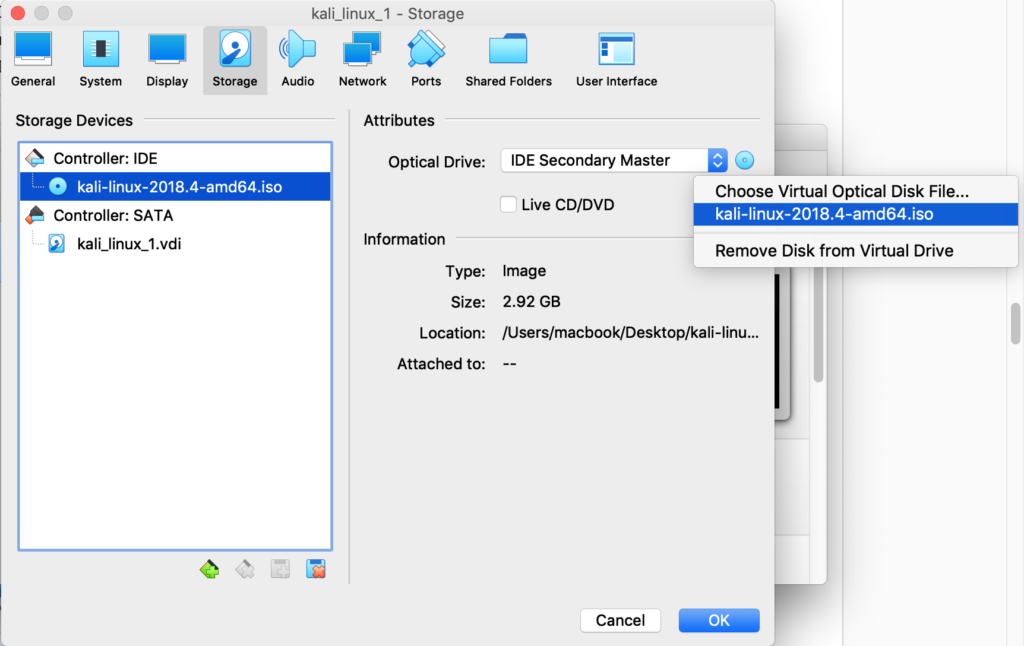
In my case, it’s kali-linux-2018.4-amd64.iso.
You should see this file I told above is under “Controller: IDE”
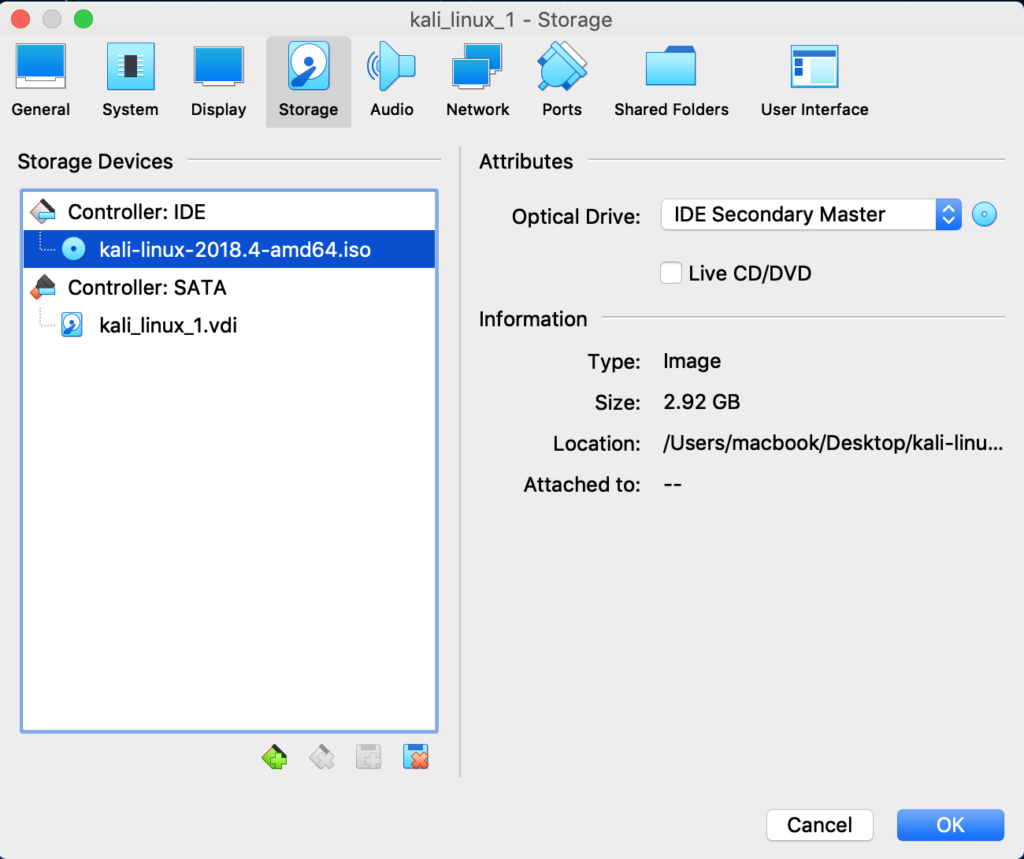
Then press OK.