Learn The Essential Git Commands Part 23 min read
In part 1, we have learned what are Git and Github, the relationship between them, learn how to fork, clone a repository, add files to a dictionary and how to push them to the remote server – Github. However, the real power of Github is that it lets us contribute and collaborate with other developers, how we can do that? We have not yet talked about it, right? Let’s learn some Git prerequisite commands before we will go to create a pull request on part 3.
Git branch
The first step to becoming a collaborator master
“Create a new branch with any new features”
Not only does create a new feature, but fix a bug also need to create a new branch.
In order to create a new branch, in your terminal type:
git branch <branch name>Now you can see your branch just has been created by typing on the terminal:
git branch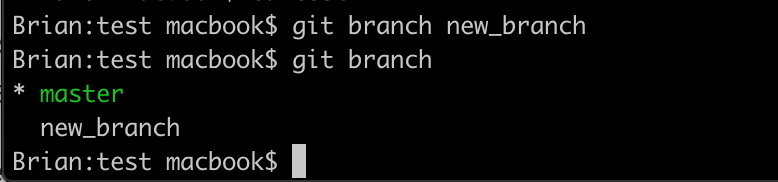
Git checkout
So, now we know how to create a new branch and why we need this. What about start making changes to your new branch? First, you need to switch to the branch you want to make some new changes.
git checkout <new branch name>
In order to save time, you are able to create a new branch and switch to by just one command:
git checkout -b <new branch name>Git log
When you add a commit to your branch, it will be saved in the commits’ history. In order to observe what you’ve done, type this command in your terminal:
Git log 
Git merge
Now on your new branch, you reckon everything is pretty good and the purpose is, you want to combine all your commits on the new branch to your origin branch master. Basically, every commit that occurred in the new branch will be brought to the master branch. In order to merge, type this command:
git merge If you want to merge with messages, you can do it by the following command:
git merge -m "your message"When you’re done with a new branch, you’re able to delete it:
git branch -d <branch name you want to delete>Git fetch
It’s like you’ve merged your local branches, but the same thing can happen in your remote repositories branches:
git fetch <remote name>For example,
git fetch <origin>Conclusion
So finally, to become a contributor and able to work with others on Github. You need to get accustomed to all of these things above. Combining what you’ve acquired rhythmically. Git is a little complex at first, hence the best thing we should do is practice with it regularly to gain more experience and find out the proper way to handle business.
Check out part 3 here, how to create your first pull request.
