How to configure Tomcat Server to Run Web Application on IntelliJ IDEA10 min read
In this article, we are going to learn how to configure the Tomcat server to run a simple “Hello World” application on the web browser with JSP and Servlet (i.e Hello World with the web edition 🙂 ).
This whole process might seem confusing and complicated at first. There are a lot of new terms and tools to learn, and that can be daunting. But I promise that if you stick with it and follow along step by step it will get easier and you will know enough to configure Tomcat to run most web applications.
First, there are 3 prerequisites that you need in your computer first before we’re moving on:
IntelliJ IDEA Ultimate is required for run enterprise application such as a web application run on Tomcat. You will also need to install the Tomcat server before we proceed any further, in this tutorial I use Tomcat server version 8, but of course, you can choose a different version if you want. Last but not least, the Java EE specification is also a requisite to run our application.
What is Tomcat Server?
You can live blissfully without going through this session and still can configure the Tomcat server. However, if you have no idea about what is Tomcat, then it’s essential for us to find out what is Tomcat and why we need them.
Apache Tomcat is an open-source Servlet container that implements several enterprise specifications such as Servlet, JSP, Expression Language, and WebSocket APIs. It’s also can be called a web server or a web container. Tomcat itself is a sophisticated and complicated piece of software that is composed of many components, however, at its core, there is a component named Catalina which acts as a Servlet container. It provides you the actual implementation for Tomcat’s servlet specification, when you start running Tomcat, you’re usually run start Catalina.
Apache Tomcat doesn’t limit itself just as a Servlet container, it also contains an engine called Coyote, which is a web server. Thanks to Coyote, you can run Tomcat other of Java enterprise specifications. However, in the scope of this article, we are only interested in working with Servlet.
Let’s get started
Open Intellij IDEA => Choose Create New Project => Choose Java Enterprise on the side bar:
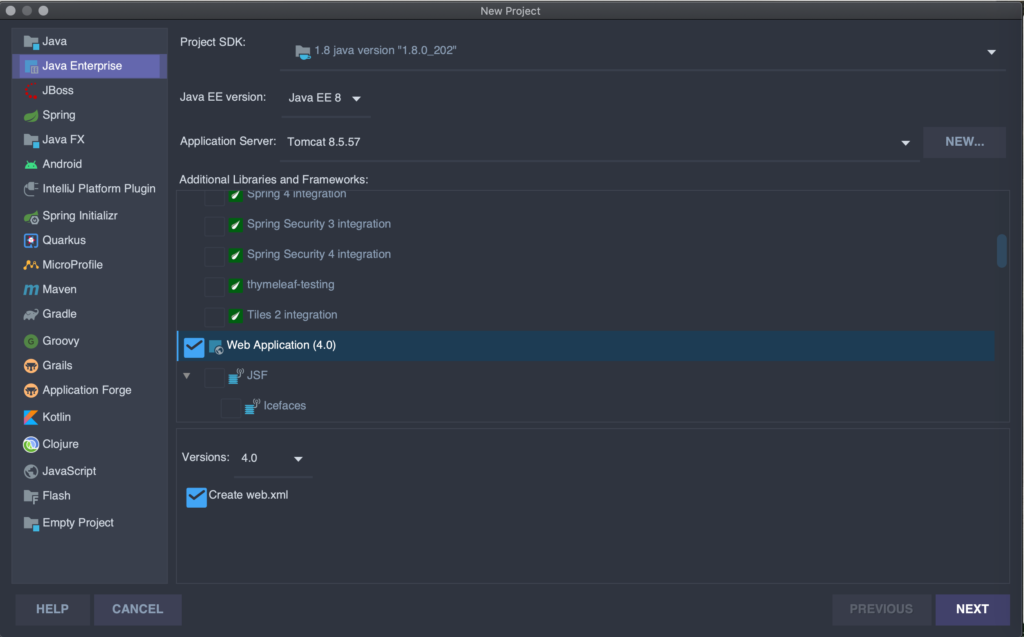
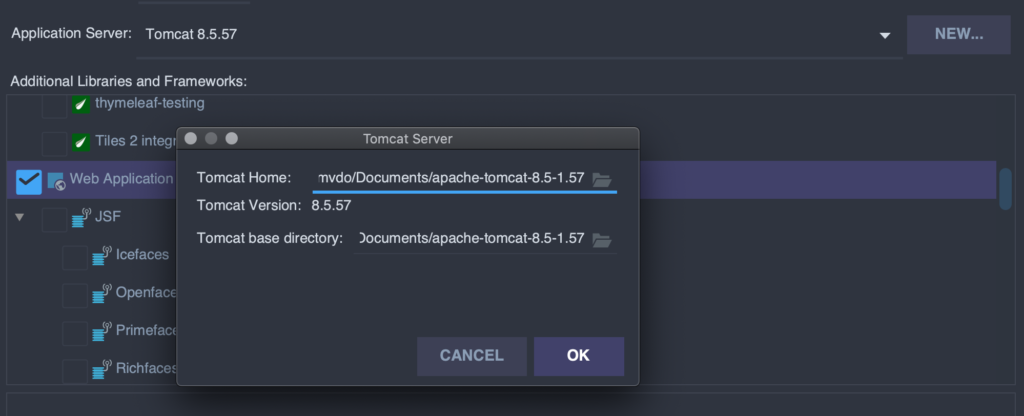
For Project SDK, you can choose a different version you have if you want, but you should choose java version 8 because newer versions such as Java 14, or Java 15 you might run into some problems. For the Java EE version, choose the newest version Java EE 8. For the Application Server, choose the Tomcat version you just installed by clicking on New, a new dialog will appear to let you choose the Tomcat location and click OK:
Then, on the Additional Libraries and Framework tab as on the first screen, scroll down and find Web Application and check it. Next, tick on Create web.xml. Finally, click Next.
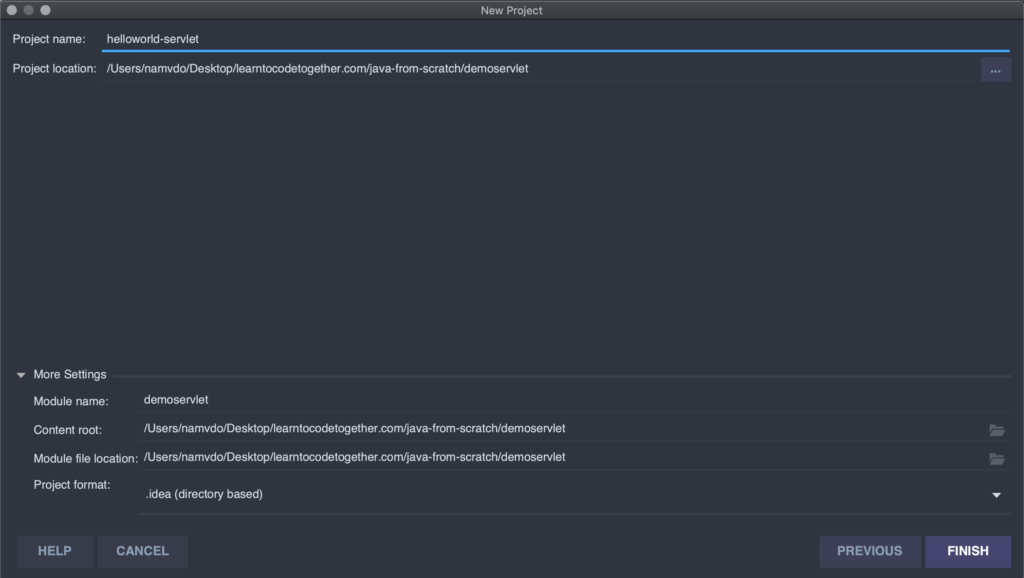
A new window shows up, in this window, you simply provide your project name and its location, you can leave everything else as it is and click Finish:
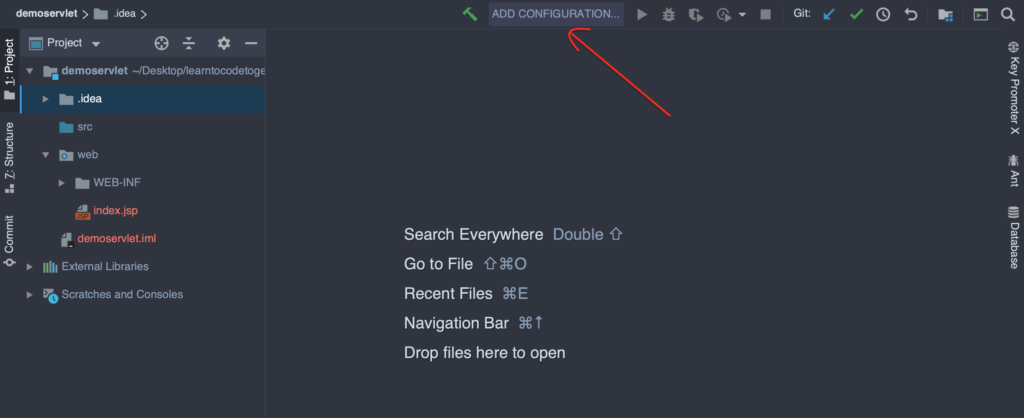
As the project window appears, on the top corner, click on “Add Configuration” (or Edit Configuration if the Tomcat configuration is already there):
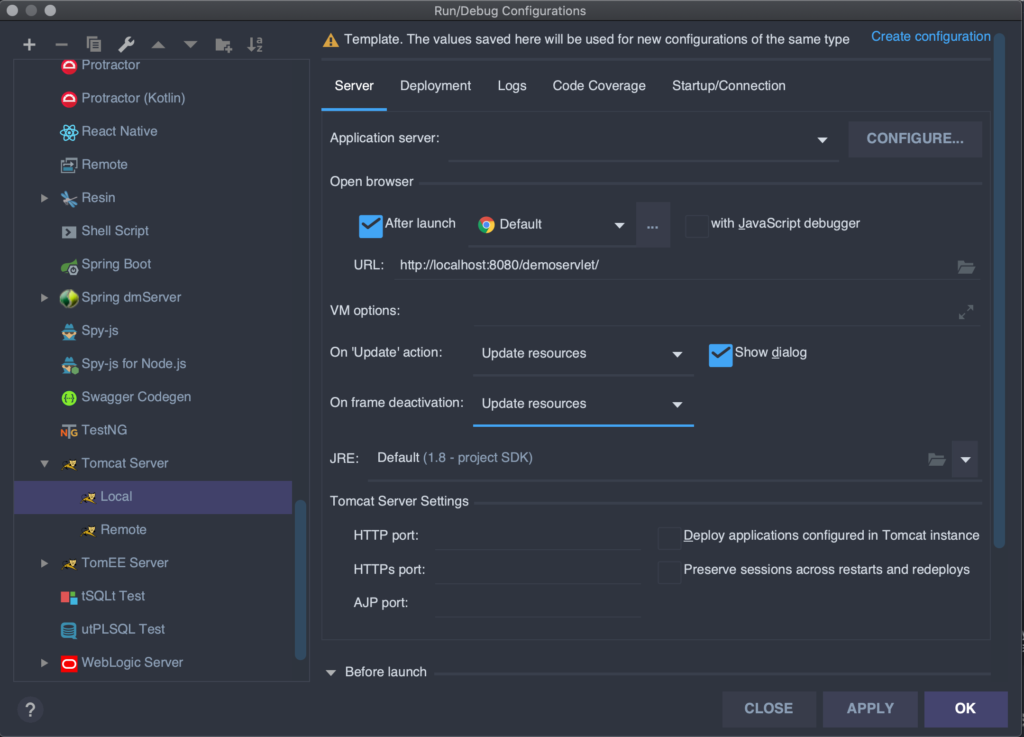
On Run/Configuration window, on the Templates tab, scroll down and click to the Tomcat Server and choose Local:
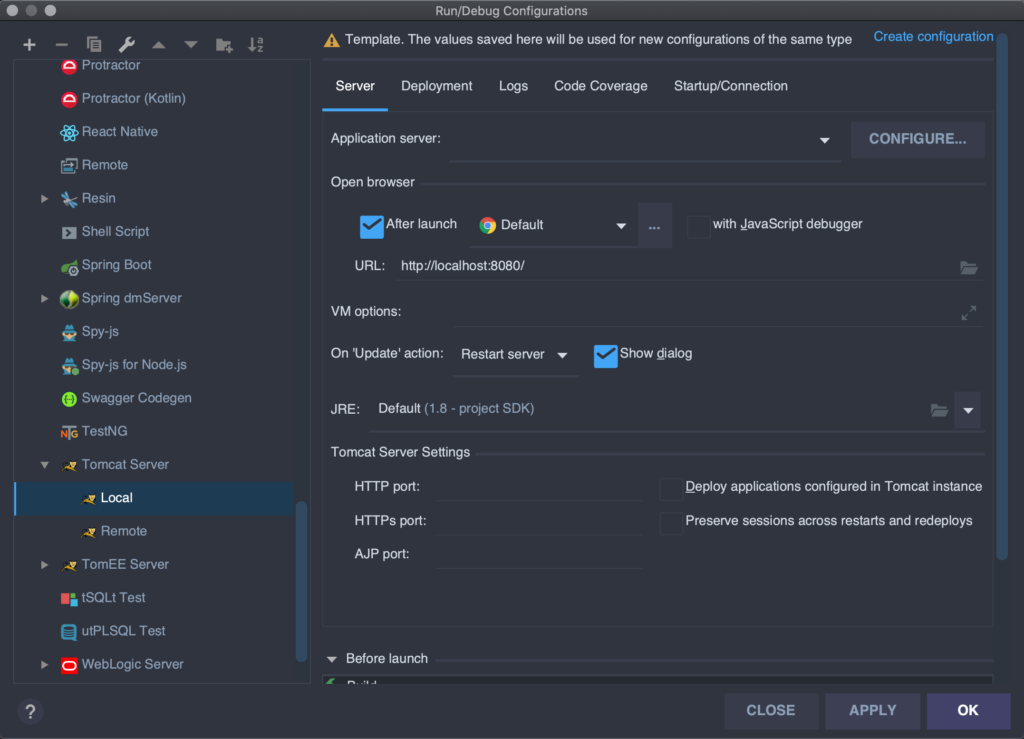
For the Application Server, you choose the correct Tomcat server’s location. For JRE, again, you can choose a different version than what you’re seeing on the screen. You also need to choose a browser to when your application starts, here I chose Chrome. Next, click to the Deployment Tab:
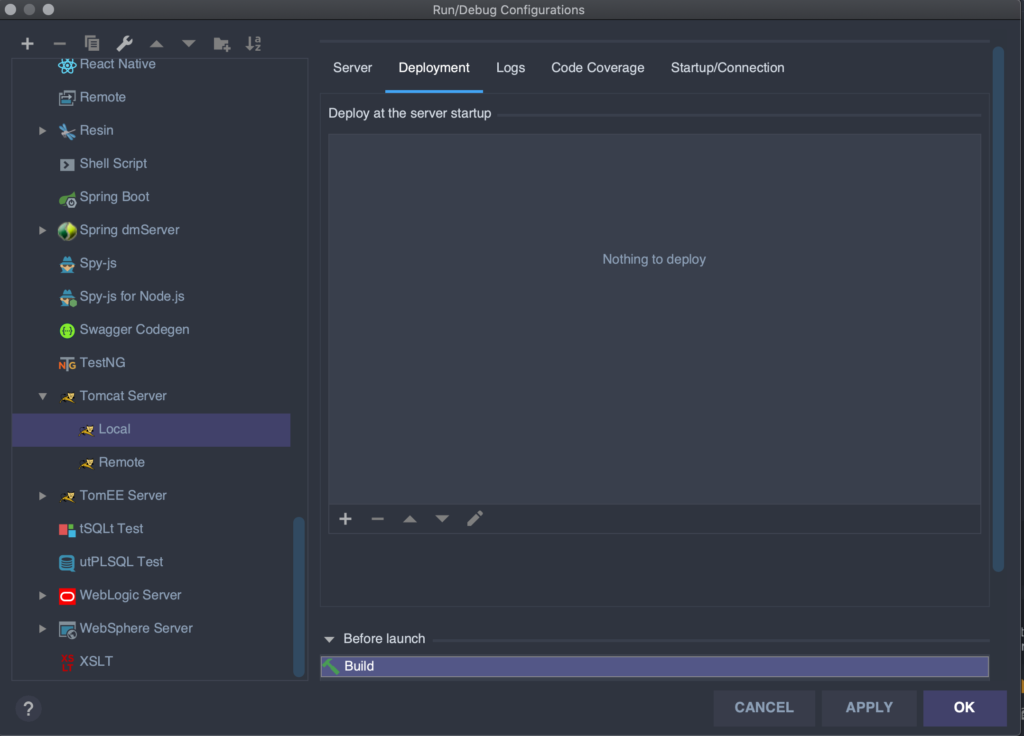
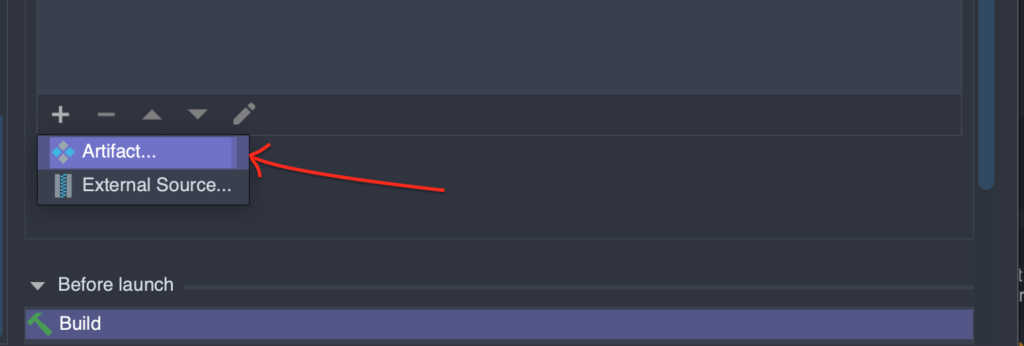
This is an important step to make our application later runnable. Click on the “+” sign as shown on the screen, choose Artifact:
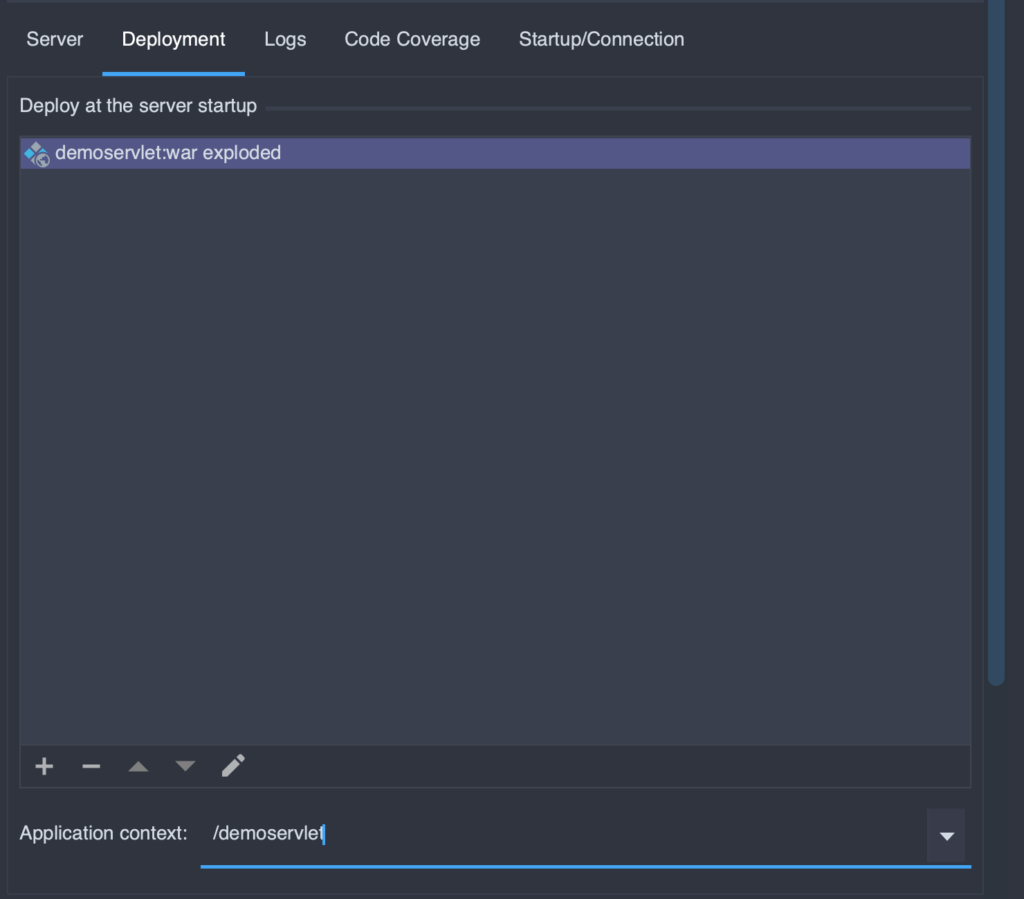
Now for the deployment at the server startup, you can see an artifact to be deployed, for the Application context, it’s the URL in which your application will run on the browser, you can leave it or choose a more concise name:
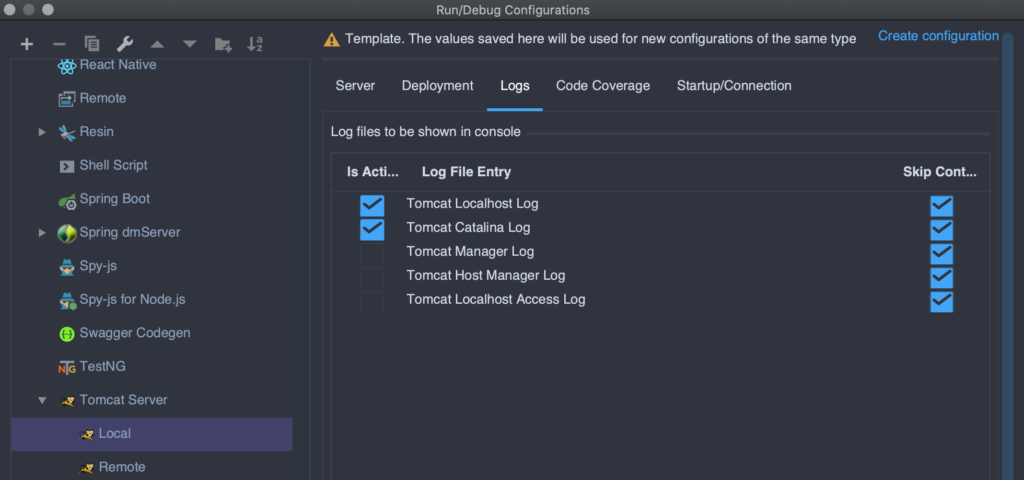
On the Log tab, check Tomcat Locahost Log and Tomcat Catalina Log:
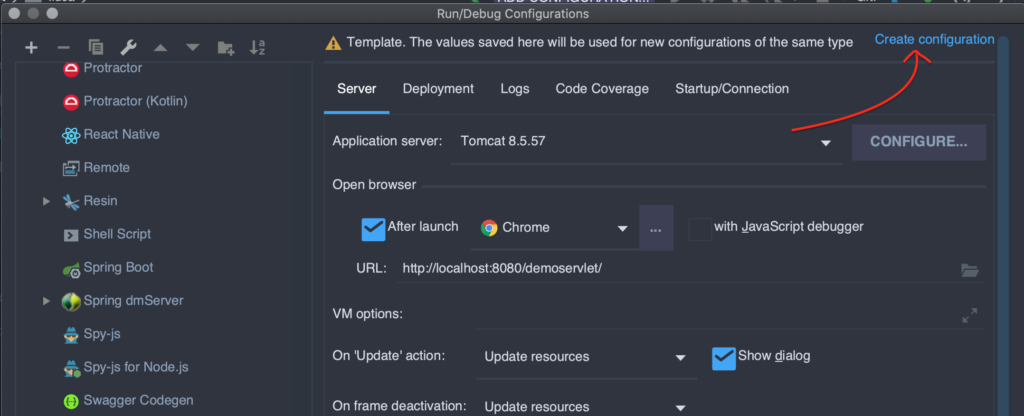
Now moving back to the Server tab, once you the artifact, you can see the URL now is on the http://locahost:8080/<your-application-context>, for me, it’s demoservlet. The locahost is the default name describing a local computer address, on this address, there are many different ports, and each port might have different functions such as port 80 is for an HTTP request, or port 25 is for SMTP, and so on. In this case, you can choose the port 80 as it’s port for HTTP requests. However, in case you have a web server running on port 80 and have another web server handling HTTP requests, then using port 8080 as an alternative option is a good practice.
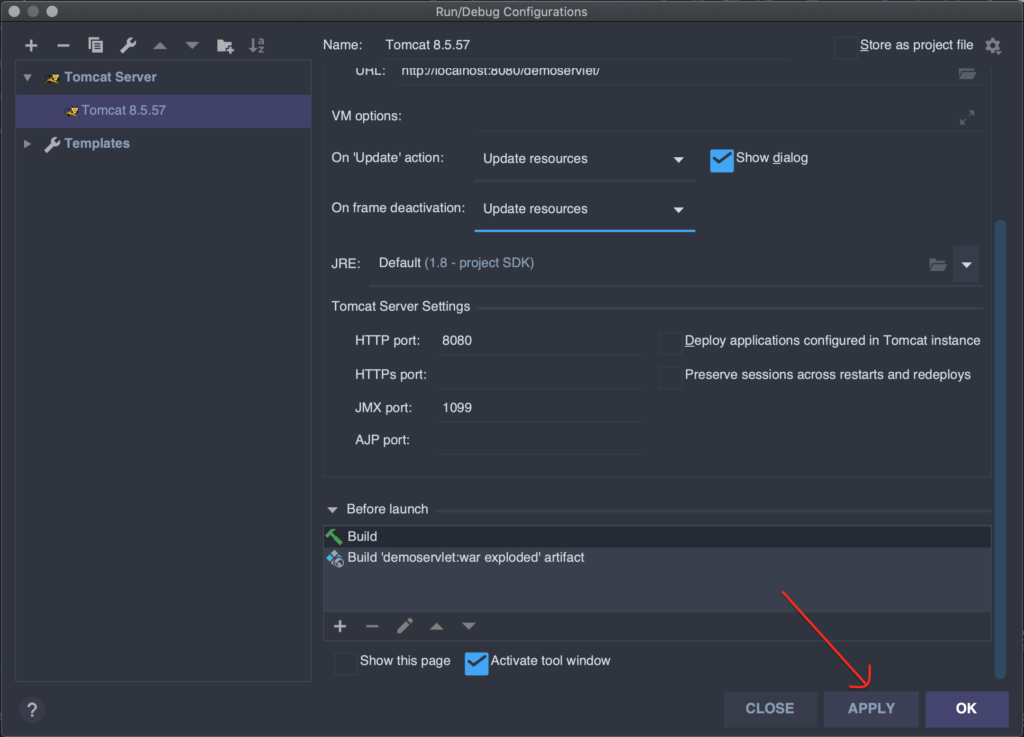
On ‘Update’ action and On frame deactivation, you choose Update resources:
If you’re experimenting this warning, then click on this:
Finally, click “Apply” and “OK“:
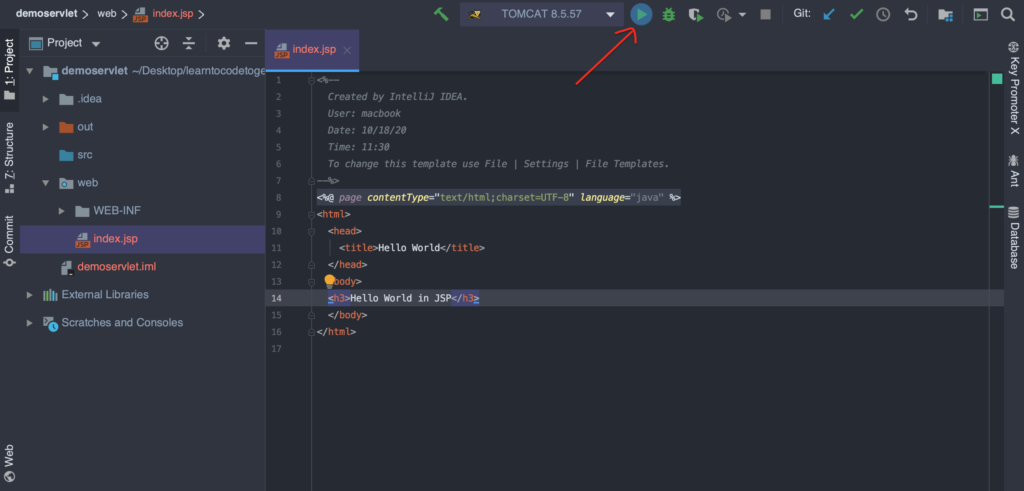
For now, you should see the Tomcat icon on the top corner and your web application is ready to start, in the starter “index.jsp” file, you can edit its content as an HTML file if you wish, and click on “Run Tomcat“:
Once you press the Run button, wait a bit for Tomcat server to start, and then you should see this text on the web broswer:
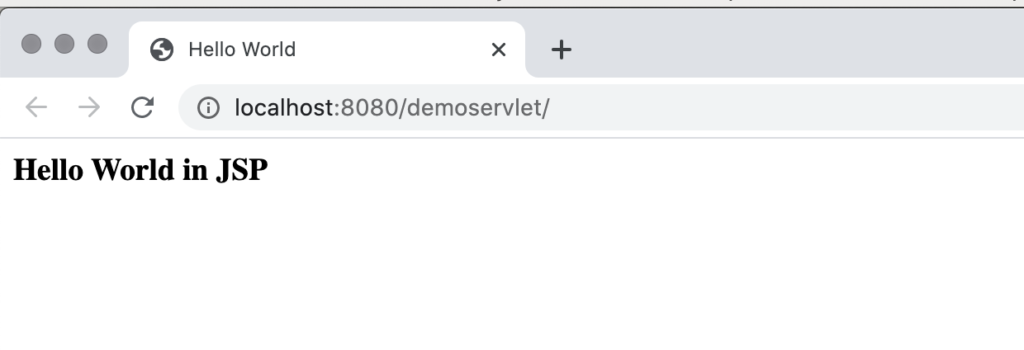
But wait, I thought you were introducing Servlet, but why it’s JSP? JSP is a technology that goes along with Servlet to create dynamic web content, on the JSP file, you can write HTML, embedded Java code, and also expression language. In essence, JSPs are Servlets, through the JSP life cycle, JSP files are always translated to Servlet first. And then this Servlet file will then be compiled.
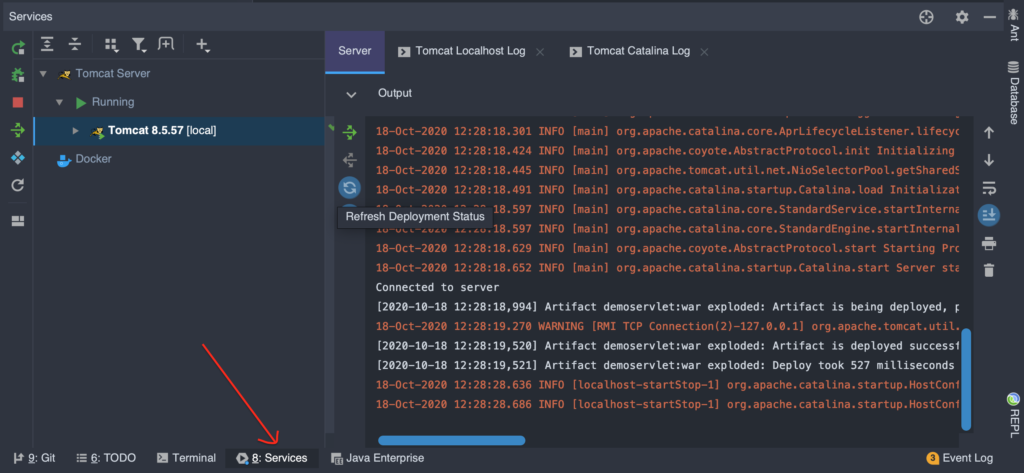
You can also view log the Server log, and Tomcat Catalina log by clicking to Services:
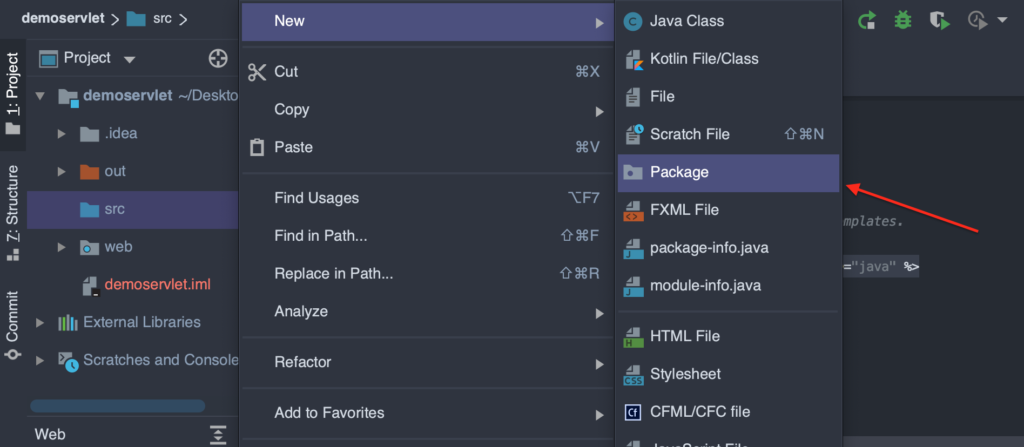
If you want to go further, instead of editing the aforementioned JSP file, let’s create a Servlet. On src, create a new package called it servlet:
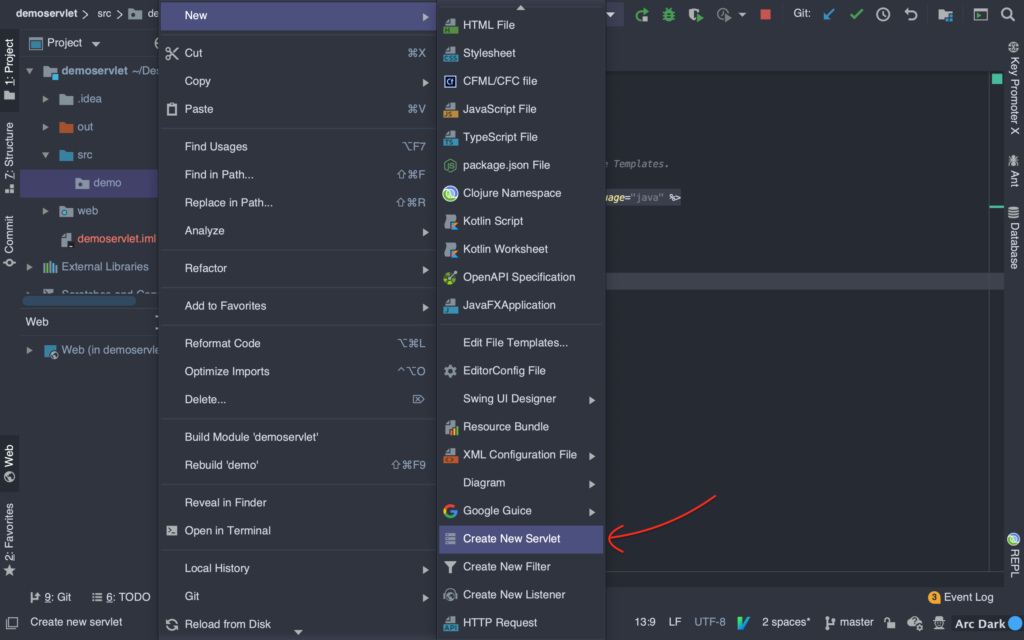
Under the package we’ve just created, right-click on this, choose New => Create New Servlet:
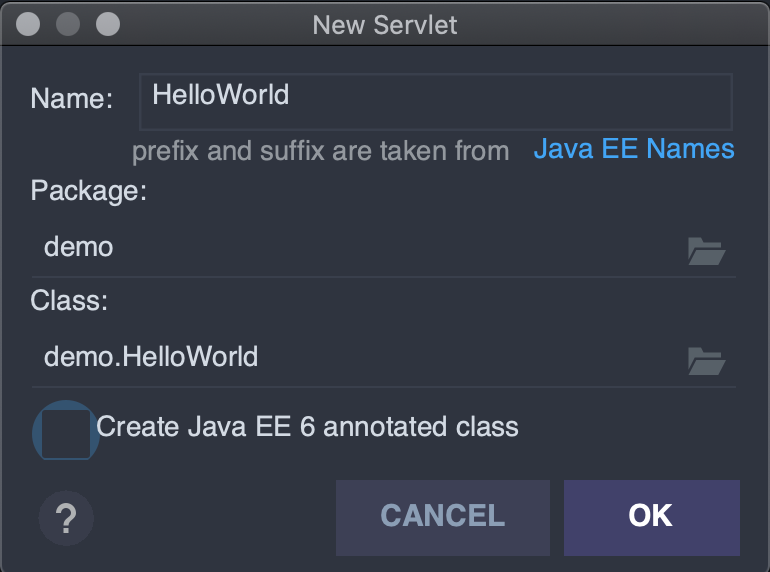
A new window pops up, you can choose the name for your servlet, and its location. Uncheck “Create Java EE 6 annotated class”, click on OK:
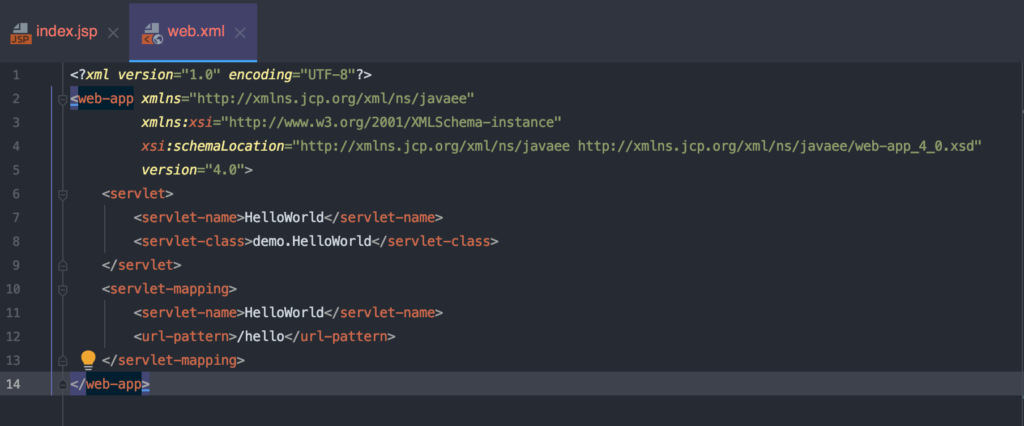
Next, we configure the WEB-INF/web.xml file, here servlet-name is self-explanatory, servlet-class defined the type of the servlet, inside the servlet-mapping tag, we define the url-pattern in which this servlet will be available:
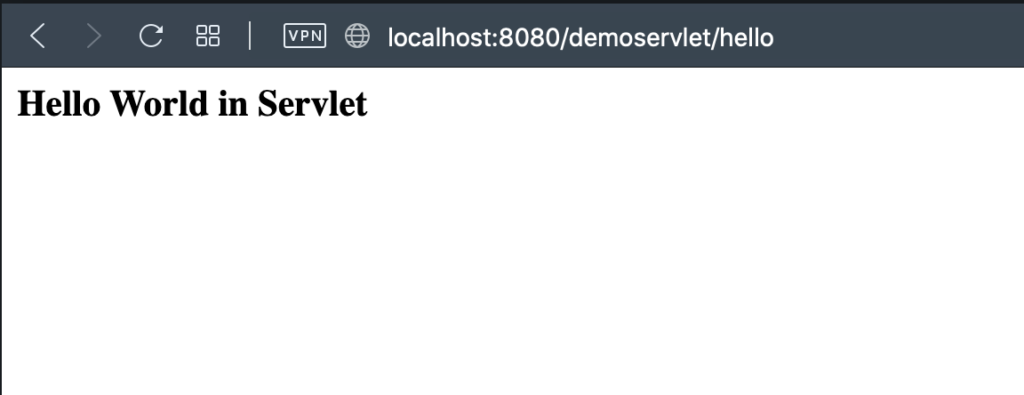
Now, navigate to your HelloWorld servlet, in the doGet() method, write the following code and click to Run Tomcat:
String htmlResponse = "<html>";
htmlResponse += "<h3>Hello World in Servlet</h3>";
htmlResponse += "</html>";
response.getWriter().println(htmlResponse);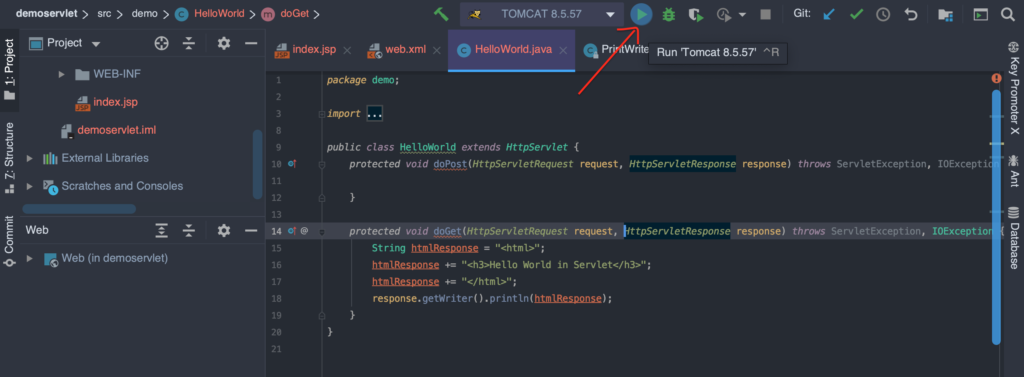
When your browser opened, go to this URL to see your servlet response: http://localhost:8080/<your-application-context>/hello. My application context is demoservlet, hence I enter http://localhost:8080/demoservlet/hello to see my servlet responses:
Conclusion
I hope you have properly set up and run the Tomcat server on IntelliJ IDEA, and if you have any troubles while configuring, don’t hesitate to leave your question in the comment session. And if you think what I am sketching is useful, don’t forget to subscribe to get weekly updates from my blog. Once again, happy coding!
