How to Submit A Pull Request to Someone Else’s Repository?8 min read
GitHub is the world-leading software platform that empowers developers to build software together. Sometimes, you might come across a project on GitHub and want to contribute. Typically, a repository on Github can have many branches; each branch can work independently on a feature. When you want to collaborate on other repositories, you cannot submit your code right away on the default branch named master. You first need to create a new pull request on a new branch, then wait for the owner to accept your request; by that time, your code will be displayed in the default branch.
Create a Pull Request on my own repository
It’s not daunting when you own the repository; if you want to create a new branch and submit a pull request on this branch, simply do as follows:
- First, clone this repository,
git clone <your repo url> - Change the directory to this directory
- Switch from
masterbranch to a new branch,git checkout -b <your new branch> - Add some changes,
git add . - Commit the changes to this branch,
git commit -m "Your messages" - Push it to the cloud,
git push --set-upstream origin <your new branch name>
Also read:
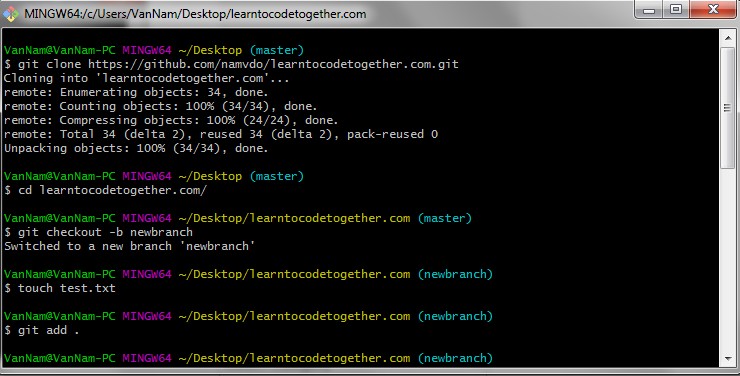
Hereby, I clone one of my repositories on GitHub; then afterward, I change the directory to the location of the repository I’ve just cloned. Create and switch to a new branch, and I add a new file test.txt to this branch, notice that initially, the branch is master, now it has changed to newbranch.

Now, after we add some changes, we need to commit those changes to the newbranch branch:

Finally, we push those changes to the branch we’ve just created:

Go back to your repository and see our work:

Click on “New pull request” button, then choose “Create pull request” to submit a pull request:

Finally, click the “Merge Pull Request” button to synthesize altogether.

Check out our “master” branch and see the changes after merging:

How to Submit A Pull Request to Someone Else’s Repository
Excited for your first pull request? To submit a pull request to another’s repository, the procedure is quite the same as your own repository. However, we need to add some extra steps; if we use the identical strategy as we did in the first section, we will get some errors:

So here we try to push the new branch again, but to another person’s repository; if we directly clone this repo and use the same steps as above, we always get this error: permission denied, unless you are invited as a collaborator.
To create a pull request on someone else’s repository, we do as follow:
- First, fork the repository you want to submit the pull request
- Clone the forked repository,
git clone <your forked repo url> - Change the folder to this repository on your computer
- Switch to a new branch,
git checkout -b "your new branch" - Add some changes,
git add . - Commit your changes,
git commit -m "Your message" - Push it!
git push --set-upstream origin <your branch name>
Fork the repository
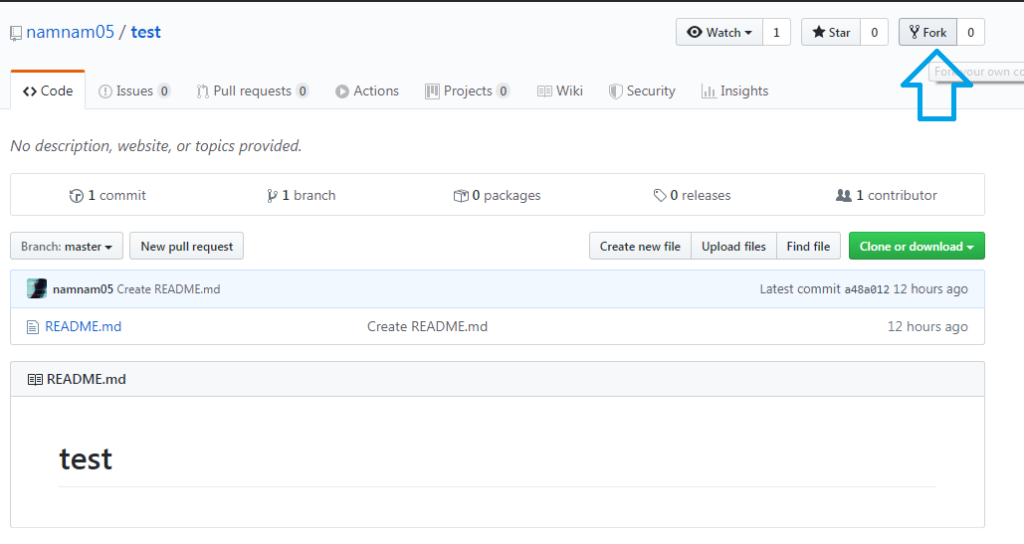
The first thing you need to do is to fork the repository you want to submit a pull request. By doing so, you create an instance of this repo to your account:

Clone the repository
From now on, we do the same thing as we did in the first example. Clone the repository you just forked by typing:
git clone <url of the copied repository>
Notice that the copy version of the repository in your account usually has an append -1, in this case, it is test-1, not test.
Create a new branch and add changes
After finishing cloning, we change to the correct folder, then inside this folder, we need to switch to a new branch:
git checkout -b <new branch name>
If you want to learn more about different commands in Git, type git --help in the terminal to learn more.
Now, I need to create some changes to this branch, here I use a file name test.txt for this purpose:

You can create a file inside Git Bash by using either touch or cat command followed by the file name you want to create. Then if you want to write plain text inside this file, you can use the echo command, as can be seen above.
Also read:
Then add the changes to this branch:
git add .The dot (.) indicates that you want to add all changes to this branch. Otherwise, you can specify a file you want to add, git add <your file name>.
Commit and Push
Momentarily, we are ready to commit the new changes; after committing, we need to take a step to push the changes to the GitHub server:
git commit -m "Your messages"
git push --set-upstream origin <your branch name>
Compare and Pull Request
We have all the additions attached to the new branch; now we have to go back to the Github interface, go to the repository you just made the commit click to the “Compare and Pull Request” button, and then conclusively click to the “Create Pull Request” button:

Congratulations, you have created your first pull request! Everything you need to do now is just to wait and see whether the owner of the repository reviews your request; you will receive an email if your change is accepted.
You can view your pull request status from the “Pull Request” bar:

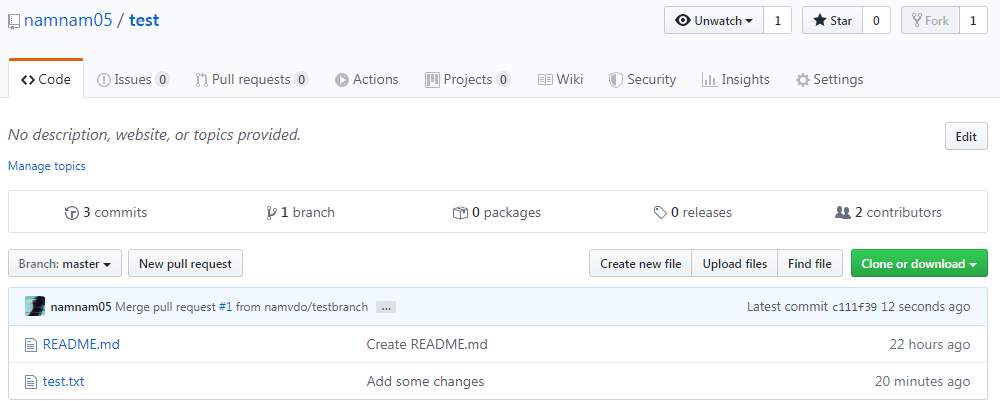
After they accept your pull request, your code will be merged and displayed in the default master branch:
