Greeting JavaScript: Thanos Snap Effect Tutorial with JavaScript9 min read
Thanos’ snap effect is one of the best Easter egg from Google that I really like. But since Google obfuscate their code, it’s a little bit hard to see the technique they used. So in the past couple of days, I spent some time trying to create one on my own. So in this tutorial, I’m going to show and explain to you how I did it. Let’s check it out!
Looking for JavaScript tutorials for beginners? Check our this link to learn now!
The Concept
First let’s begin the concept. If you inspect the Google animation, you’ll see that they created multiple canvases that each one contain part of the original element. Then rotate and transform them until they fade away.
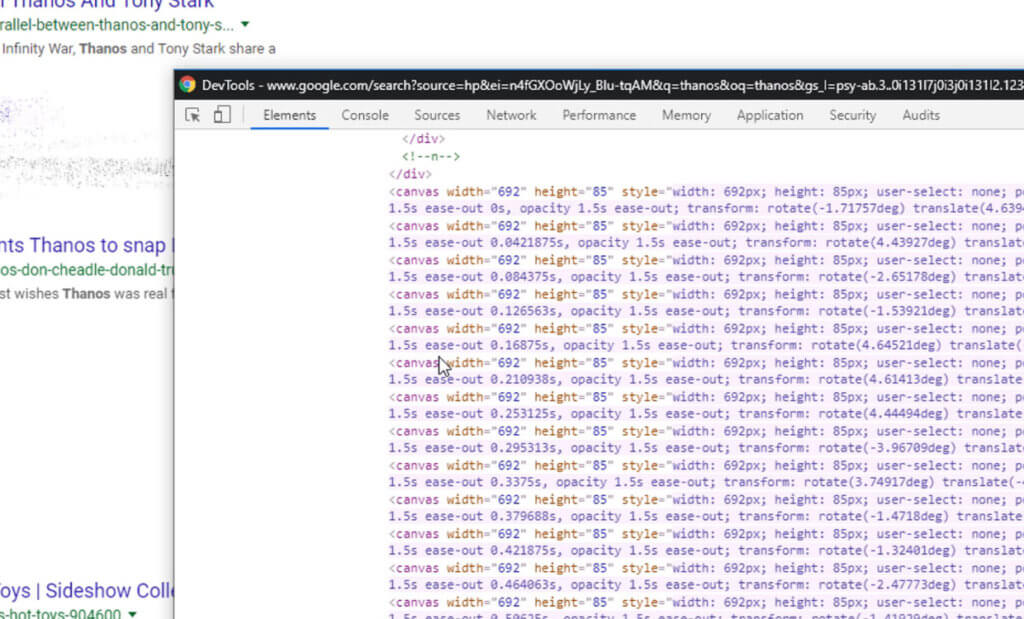
So with this concept, we’ll need to find a way to convert our element to image on canvas object. Then randomly distribute pixels from that image to multiple canvases. And finally add animation to each of them and hide the original element.
Simply put, convert element to image. Chop them to pieces and add the animation.
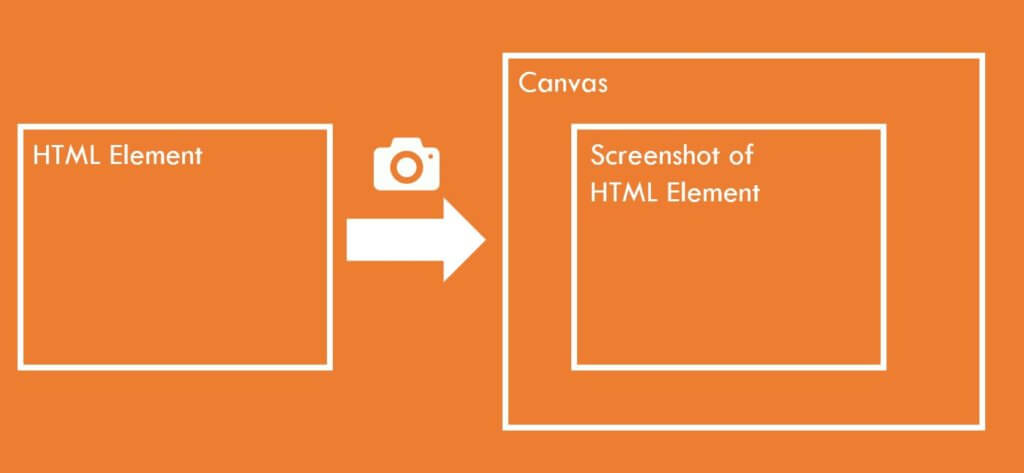
First Step – Convert Element to Image
Here is our sample page
<div class="content">
     <img src="person.png" height="600">
     <button id="start-btn">Snap!</button>
</div>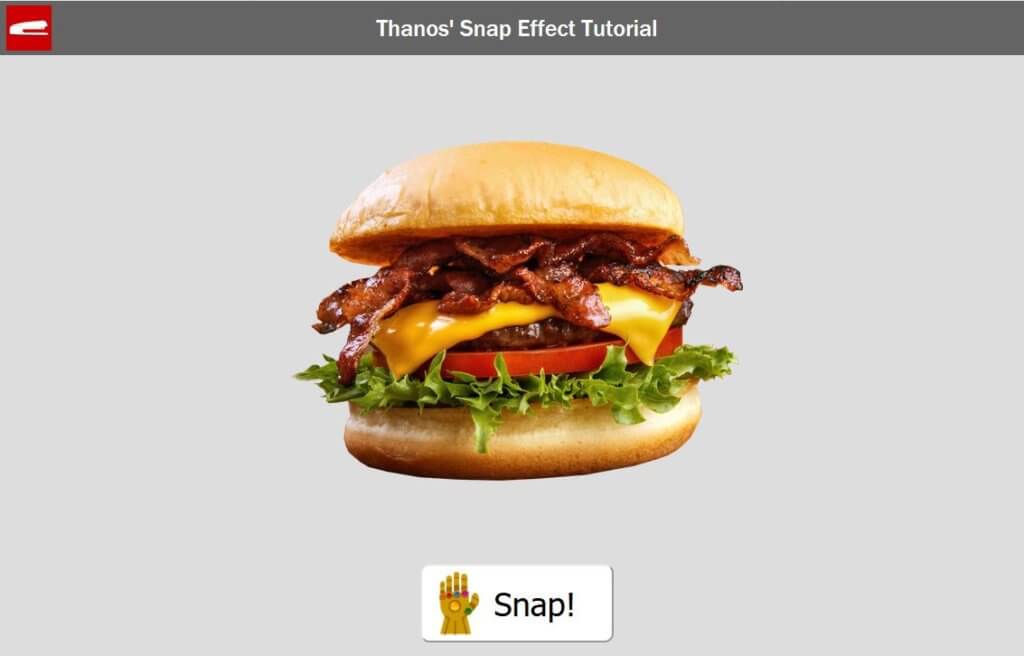
Fortunately, we have a very useful library calls html2canvas. You can just pass any HTML element and it will return the canvas object for you. Once we have included the library, we’ll pass our div element to get the canvas object. Then we’ll get an array containing all pixels data from it.
html2canvas($(".content")[0]).then(canvas => {
//capture all div data as image
ctx = canvas.getContext("2d");
var imageData = ctx.getImageData(0, 0, canvas.width, canvas.height);
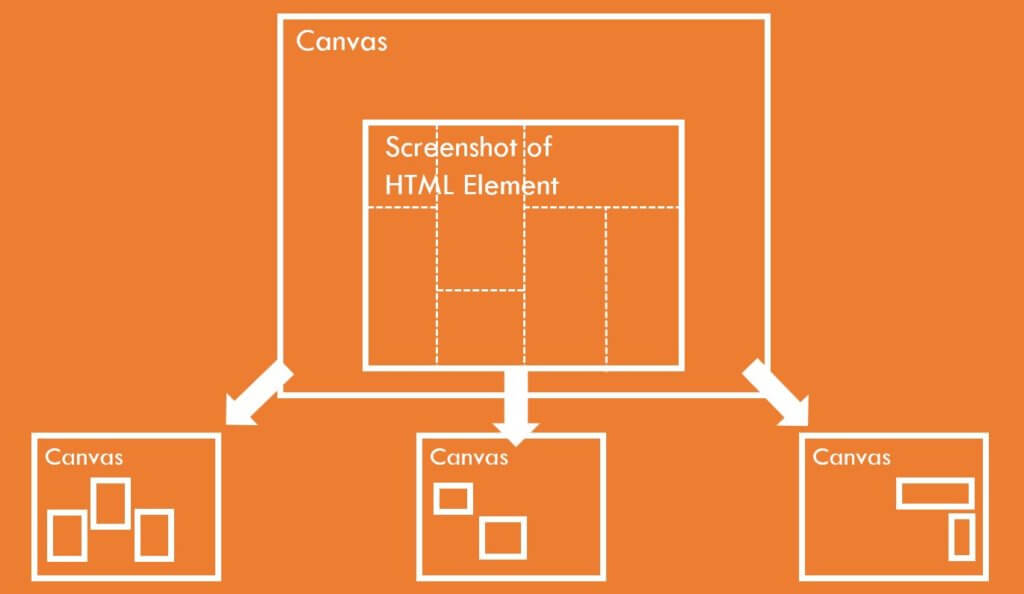
var pixelArr = imageData.data;Second Step – Chop Them to Pieces
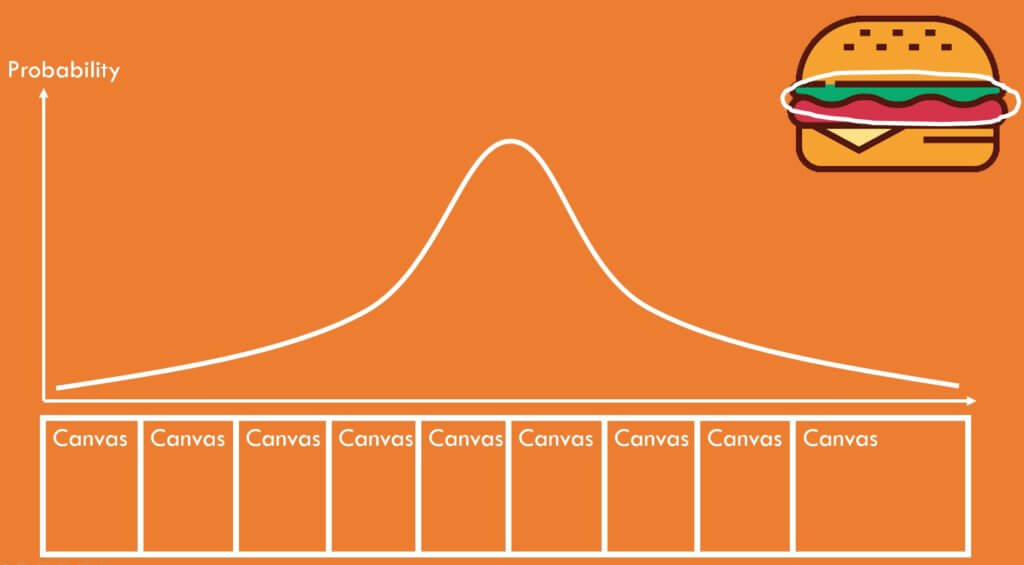
We have the pixels array, we’ll try to distribute the pixels data to multiple canvases. But this is a little bit tricky. Since we want the animation to start fading away from top to bottom, we need majority pixels at the top of burger to be in the first group of canvases. And majority of bottom pixels in the last canvases group. This way, when we start each canvas’ animation sequentially , it will look like it’s fading from top to bottom.
The problem is this is not a regular random anymore so we can’t just use Math.random . What I did was creating a weighted distribution function. Basically we’ll just increase the probability for the top pixels to be in the first canvases group and the bottom to be in the last.

To achieve this, I also use chance.js A JavaScript library dedicated to the random utility. We made a tutorial video about this one month ago. Check it out if you’re interested.
function weightedRandomDistrib(peak) {
  var prob = [], seq = [];
  for(let i=0;i<canvasCount;i++) {
    prob.push(Math.pow(canvasCount-Math.abs(peak-i),3));
    seq.push(i);
  }
  return chance.weighted(seq, prob);
}
Now we have the distributed pixels data. we’ll create canvases from them,and assign a class name. Then append them to the wrapper.
//put pixel info to imageDataArray (Weighted Distributed)
for (let i = 0; i < pixelArr.length; i+=4) {

  //find the highest probability canvas the pixel should be in
  let p = Math.floor((i/pixelArr.length) *canvasCount);
  let a = imageDataArray[weightedRandomDistrib(p)];
  a[i] = pixelArr[i];
  a[i+1] = pixelArr[i+1];
  a[i+2] = pixelArr[i+2];
  a[i+3] = pixelArr[i+3];
}
//create canvas for each imageData and append to target element
for (let i = 0; i < canvasCount; i++) {
  let c = newCanvasFromImageData(imageDataArray[i], canvas.width, canvas.height);
  c.classList.add("dust");
  $(".wrapper").append(c);
}
Last Step – The Animation
The last step is to add the animation. first, we’ll start fading away the original content using jQuery fadeout.
//clear all children except the canvas
$(".content").children().not(".dust").fadeOut(3500);
Then for each canvas, we’ll add three animations. First is a blur. We add this to soften the transform or it will look pixelated. The second is a transform. This is to move the pixels away from the original position. We add both rotations and translate using random value to simulate the dust effect. And the third is fadeout to fade away the dust particle.
//apply animation
$(".dust").each( function(index){
  animateBlur($(this),0.8,800);
  setTimeout(() => {
    animateTransform($(this),100,-100,chance.integer({ min: -15, max: 15 }),800+(110*index));
  }, 70*index);
  //remove the canvas from DOM tree when faded
  $(this).delay(70*index).fadeOut((110*index)+800,"easeInQuint",()=> {$( this ).remove();});
});
The tricky part is jQuery doesn’t directly support blur or transform animation so I have to manually create a function for them (See full source code below)
On the CSS side, There is nothing much. Just flex display to center everything and basic style for the snap button. The only thing related to the effect is the position absolute. This is to make all the canvases stay in the same position. The rest of the animation is handled by the JavaScript.
.dust {
  position: absolute;
}
See the result in this video below!
So that’s how the code works. It took me several hours to get them right. I know it’s a lot to take in and quite complicated so let me know if you have any questions or feedback. You get the source code at the end of this post!
And that’s all for this tutorial. Hope you guys enjoy and don’t forget to subscribe our Channel if you’re new to Red Stapler. Stay tune for next video and see you next time. Bye!
Source Code
HTML
<!DOCTYPE html>
<html>
    <head>
    <meta http-equiv="content-type" content="text/html; charset=UTF-8" />
    <link rel="stylesheet" type="text/css" href="styles.css">
    <script src="html2canvas.min.js"></script>
    <script src="chance.min.js"></script>
    <script src="jquery-2.1.4.js"></script>
    <script src="jquery-ui-1.9.2.custom.min.js"></script>
    </head>
    <body>

      <div class="content">
        <img src="burger.png" height="600">
        <button id="start-btn">Snap!</button>
      </div>

    <script>

    var imageDataArray = [];
    var canvasCount = 35;
    $("#start-btn").click(function(){

      html2canvas($(".content")[0]).then(canvas => {
        //capture all div data as image
        ctx = canvas.getContext("2d");
        var imageData = ctx.getImageData(0, 0, canvas.width, canvas.height);
        var pixelArr = imageData.data;
        createBlankImageData(imageData);
        //put pixel info to imageDataArray (Weighted Distributed)
        for (let i = 0; i < pixelArr.length; i+=4) {
          //find the highest probability canvas the pixel should be in
          let p = Math.floor((i/pixelArr.length) *canvasCount);
          let a = imageDataArray[weightedRandomDistrib(p)];
          a[i] = pixelArr[i];
          a[i+1] = pixelArr[i+1];
          a[i+2] = pixelArr[i+2];
          a[i+3] = pixelArr[i+3];
        }
        //create canvas for each imageData and append to target element
        for (let i = 0; i < canvasCount; i++) {
          let c = newCanvasFromImageData(imageDataArray[i], canvas.width, canvas.height);
          c.classList.add("dust");
          $("body").append(c);
        }
        //clear all children except the canvas
        $(".content").children().not(".dust").fadeOut(3500);
        //apply animation
        $(".dust").each( function(index){
          animateBlur($(this),0.8,800);
          setTimeout(() => {
            animateTransform($(this),100,-100,chance.integer({ min: -15, max: 15 }),800+(110*index));
          }, 70*index);
          //remove the canvas from DOM tree when faded
          $(this).delay(70*index).fadeOut((110*index)+800,"easeInQuint",()=> {$( this ).remove();});
        });
      });
    });
    function weightedRandomDistrib(peak) {
      var prob = [], seq = [];
      for(let i=0;i<canvasCount;i++) {
        prob.push(Math.pow(canvasCount-Math.abs(peak-i),3));
        seq.push(i);
      }
      return chance.weighted(seq, prob);
    }
    function animateBlur(elem,radius,duration) {
      var r =0;
      $({rad:0}).animate({rad:radius}, {
          duration: duration,
          easing: "easeOutQuad",
          step: function(now) {
            elem.css({
                  filter: 'blur(' + now + 'px)'
              });
          }
      });
    }
    function animateTransform(elem,sx,sy,angle,duration) {
      var td = tx = ty =0;
      $({x: 0, y:0, deg:0}).animate({x: sx, y:sy, deg:angle}, {
          duration: duration,
          easing: "easeInQuad",
          step: function(now, fx) {
            if (fx.prop == "x")
              tx = now;
            else if (fx.prop == "y")
              ty = now;
            else if (fx.prop == "deg")
              td = now;
            elem.css({
                  transform: 'rotate(' + td + 'deg)' + 'translate(' + tx + 'px,'+ ty +'px)'
              });
          }
      });
    }
    function createBlankImageData(imageData) {
      for(let i=0;i<canvasCount;i++)
      {
        let arr = new Uint8ClampedArray(imageData.data);
        for (let j = 0; j < arr.length; j++) {
            arr[j] = 0;
        }
        imageDataArray.push(arr);
      }
    }
    function newCanvasFromImageData(imageDataArray ,w , h) {
      var canvas = document.createElement('canvas');
          canvas.width = w;
          canvas.height = h;
          tempCtx = canvas.getContext("2d");
          tempCtx.putImageData(new ImageData(imageDataArray, w , h), 0, 0);

      return canvas;
    }
    </script>
    </body>
</html>
CSS
* {
  box-sizing: border-box;
}
body {
  margin: 0;
  min-height: 100vh;
  display: flex;
  justify-content: center;
  align-items: center;
  background: #ddd;
}
.content {
  display: flex;
  align-items: center;
  flex-direction: column;
  background: #ddd;
}
#start-btn {
  font-size: 36px;
  padding: 20px 40px 20px 80px ;
  margin-top: 30px;
  border-radius: 10px;
  background:url("thanos-logo.png") white 15px no-repeat;
  background-size: 50px;
}
.dust {
  position: absolute;
}
Source: Red Stapler
