Learn Java from Scratch: Java Environment Setup step-by-step12 min read
In the first tutorial, we have learned how to write the very first program in Java. These lines of codes are syntactically correct, but how can you run it on your local machine? In this article, we are going to walk through in detail how can you compile and run Java programs on your local machine.
If you prefer writing code on a text editor such as VSCode, then first off you need to install the JDK (Java Development Kit) which contains compiling tools and some other tools to help you run your Java applications.
However, if an IDE is your choice, such as NetBeans IDE, the latest version of this IDE then you don’t need to install JDK because it has been bundled in this IDE when you install it, but if you install NetBeans 8 or lower versions, you still need to install JDK manually.
Step 1: Download the JDK from Oracle
First, you need to follow this link: https://www.oracle.com/technetwork/java/javase/downloads/jdk8-downloads-2133151.html to download Java SE Development Kit 8, or in the navigation bar at the top of this site, you can click on Java SE to choose different versions if you want, but I recommend you download JDK 8. And make sure you choose the version which is based on your OS.
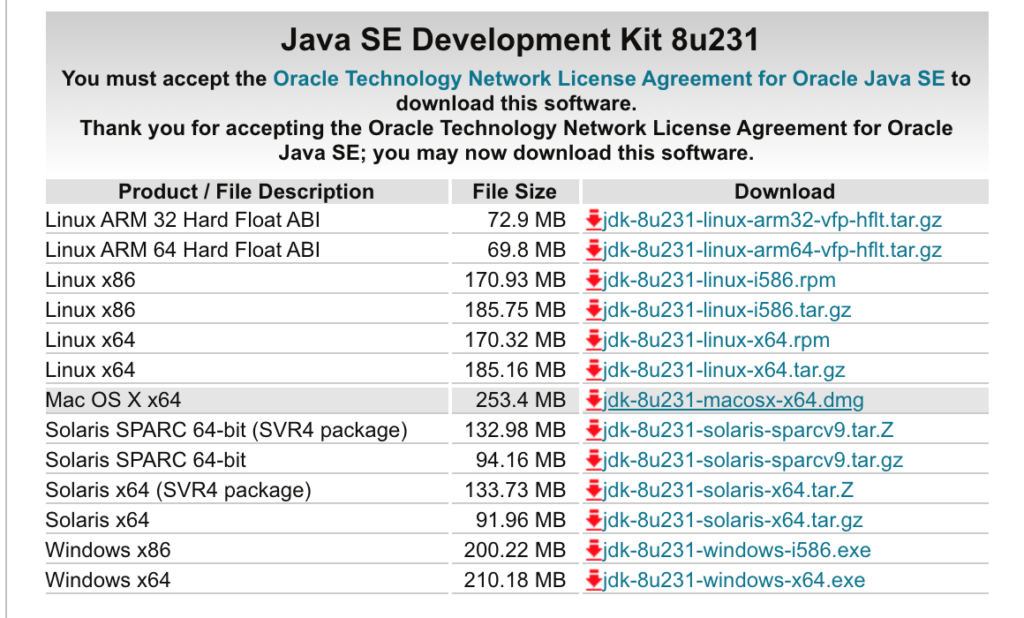
Because here I’m using macOS, so I will choose the Mac OS X x64 version which fits my OS. After finishing downloading, on macOS, you should run the .dmg file and if you are on Windows you should run the .exe and basically we’re done. If you may, however, want to set the classpath as an environment variable, then we will move on step 2!
Step 2: Set Up a Development Environment
Windows:
Assuming you have installed Java in C:\Program Files\java\jdk directory, open command prompt, cd to the place that you have installed Java and locate the bin directory, copy the path below and paste it into the command line prompt:
set path=C:\Program Files\Java\jdk1.8.0_121\bin
Note that your jdk version might be different, and you should set the Java version based on what you have installed on your computer.
macOS:
Open your terminal and type the following command and hit return:
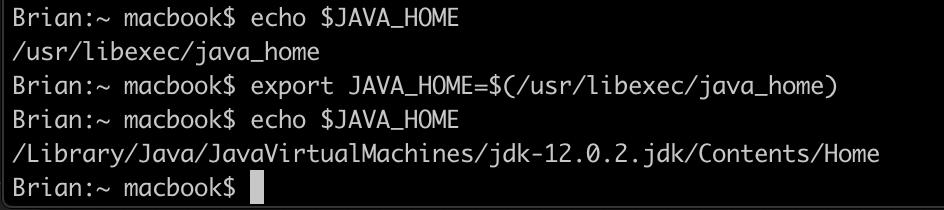
echo $JAVA_HOMEAnd then you should see the Java Home already set up for you, something like: /usr/libexec/java_home
Then, again, in the terminal, type following command and hit return:
export JAVA_HOME=$(/usr/libexec/java_home)Then execute echo $JAVA_HOME once again to check the value of the Java Home variable, you should see something like this:
/Library/Java/JavaVirtualMachines/jdk-12.0.2.jdk/Contents/HomeAgain, the jdk version of yours might be different, here you see jdk-12.0.2 because I have installed this version.
Step 3: Verify your Java Compiler
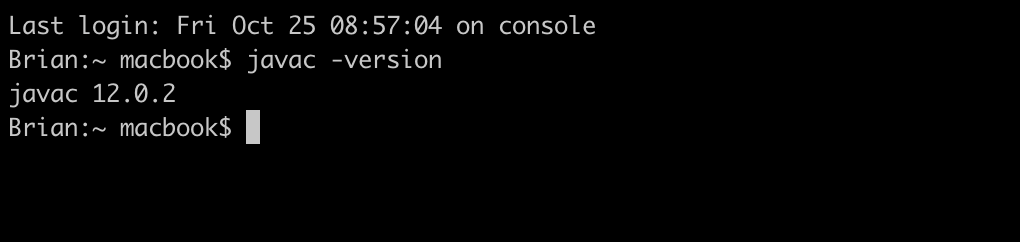
To make sure that your Java compiler has been recognized in your machine, in your terminal type the following command and hit enter:
javac -version
If you can see the version of Java printed out in your terminal, OK, it worked. Otherwise, you should go back and check your previous steps:
Step 4: Writing and Running your Java Program
When you have finished with download JDK and set up the particular path where the Java binaries have been installed. Then it’s time for us to write a simple Java program and run it. Open up your favorite editor and write those line of code into it:
public class FirstJavaProgram {
    public static void main(String[] args){
      System.out.println("My first Java program!"); // display the string
    }
}
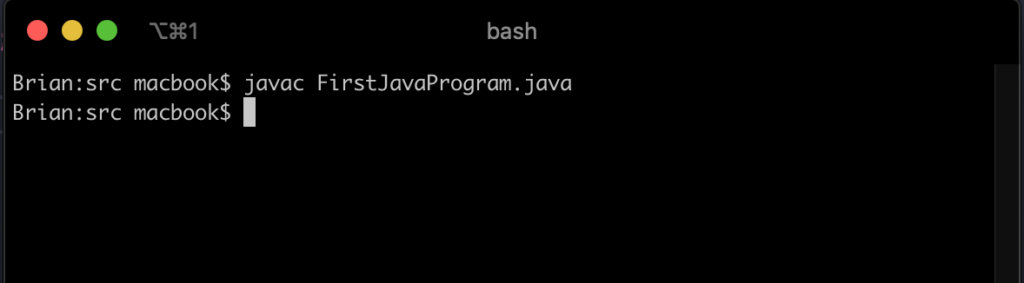
Then save your file as FirstJavaProgram.java because the name of the file should be the same as public class name as you remember from the very first lesson. Soon afterward, we will compile this program. On Windows open up your command prompt by typing cmd on your Windows Search. With macOS, in the Spotlight Search type terminal to open your teminal and then change the directory to where you store your Java program and type this command to compile the file:
javac FirstJavaProgram.java
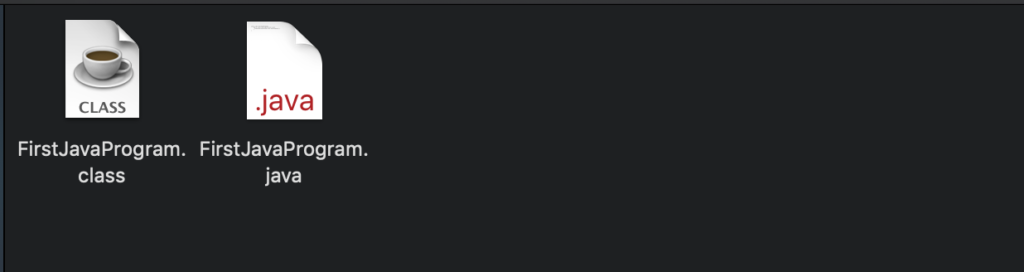
If you don’t see any error and your screen looks like what above, then your file has been compiled successfully. After compilation the .java file gets translated into the .class file (byte code). You should see the FirstJavaProgram.class also, reside in the same place as your FirstJavaProgram.java file:
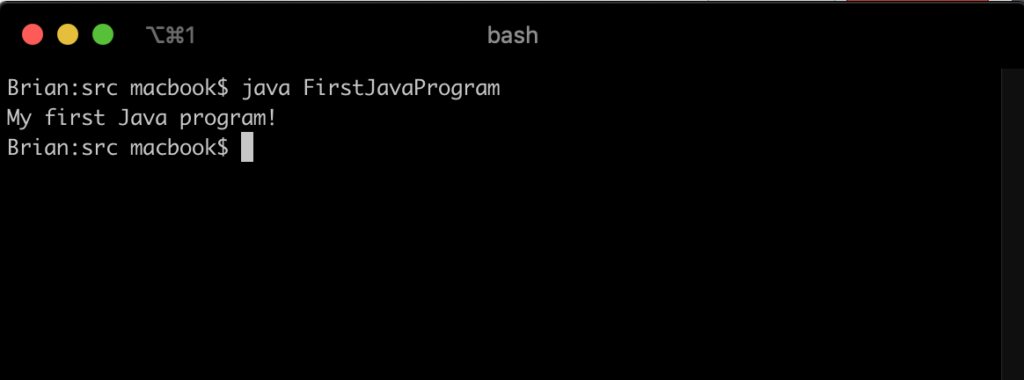
Now, this program has been successfully compiled, now we can run this program by typing following command to your terminal:
java FirstJavaProgram
You should notice that you shouldn’t append .java to the file name while running the program.
Using the Code Editor and IDE
If you don’t want to use the terminal to compile and run the Java program, there are several alternative ways that you can go with, such as using code editor and integrated development environment (IDE).
Visual Studio Code
Code Runner
There are many code editors which let you install the extensions and run your Java program right inside it without typing javac YourJavaProgram.java and java YourJavaProgram, Visual Studio Code is one of those. VS Code is the free and open-source code editor and if you want to use but haven’t downloaded it yet, go here to download this code editor: https://code.visualstudio.com
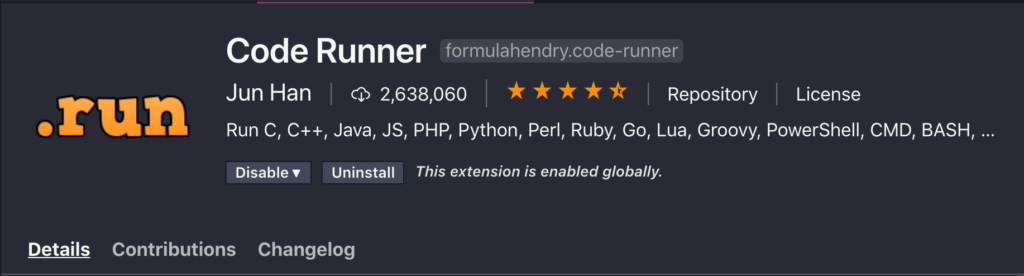
Now if you already install VS Code, go to the Extensions tab in Visual Studio Code and search “Code Runner” and install this one:
After installing this extension, perhaps you should restart your code editor, then open up your Java program and you should see the button “Run Code” on the top right, simply click on it and see the program runs:
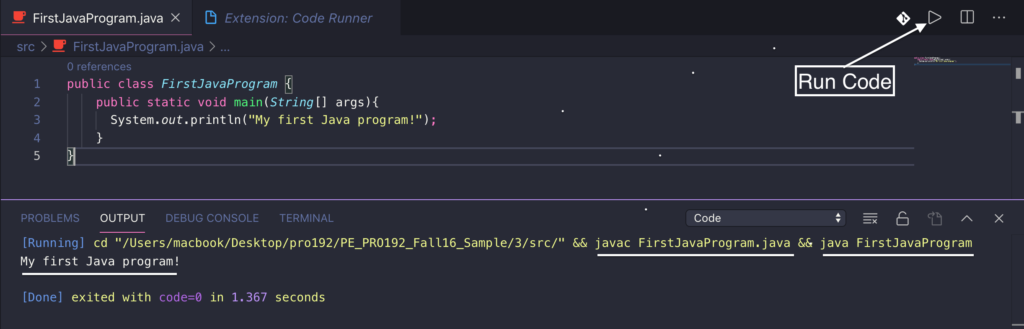
As you can see, the program compiled and ran automatically, and actually this extension helps you change your current directory to the right place and do javac and java for you and display the output right underneath. However, if your program works with input from the keyboard then you need to use your terminal or IDEs because this extension on Visual Studio Code just supports read-only mode and you cannot write anything like input something to the output.
Language Support for Java(TM) by Red Hat
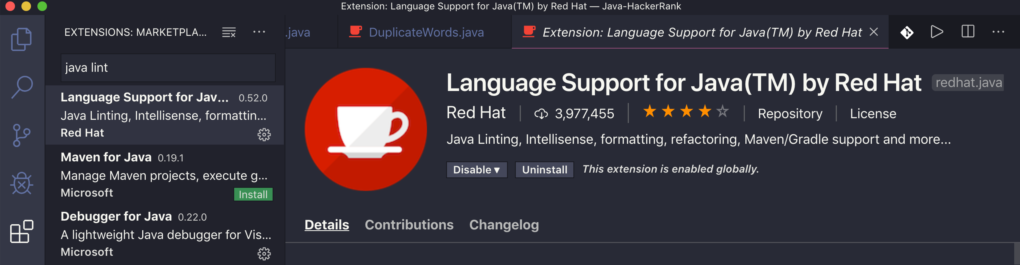
However, you want to stick with VS Code and working with some kind of input you enter from the keyboard (we will talk about standard input in Java later soon), there is an extension you can install, which is Language Support for Java(TM) by Red Hat, on the tab Extensions, type “java lint” and install this extension:
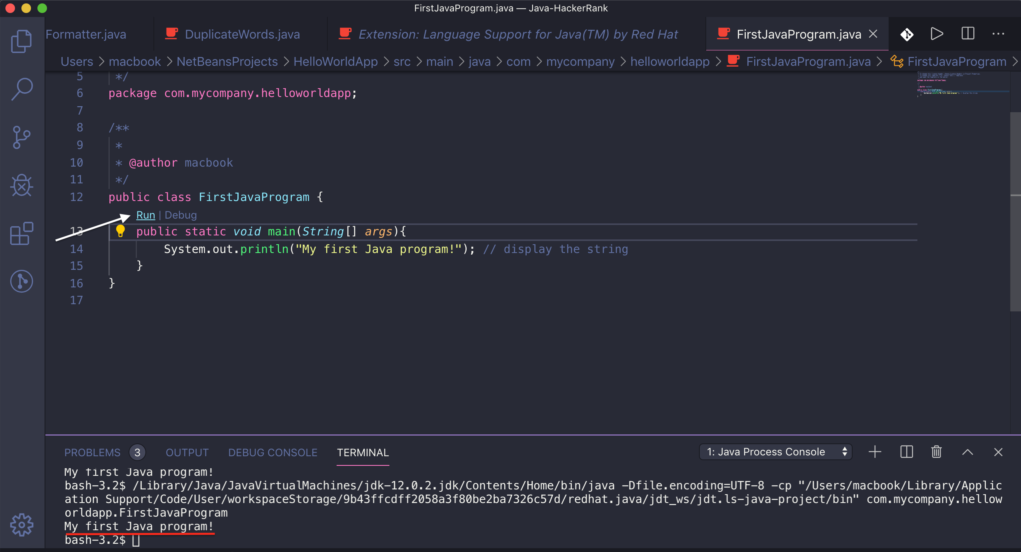
After installing this extension, go back to your file, click to “Run” right above your main function and see the output:
NetBeans IDE
Netbeans is the open-source and free IDE to use, first you need to download this IDE here: https://netbeans.apache.org/download/index.html. There are different releases, you can choose the right one by clicking on the Features button on each release to see which one is suitable for you.
1. Launch the NetBeans IDE
When you have downloaded and installed this IDE on your machine, now open it up and do some works:
- On Microsoft Windows systems, you can use the NetBeans IDE item in the Start menu.
- On Mac OS X systems, click the NetBeans IDE application icon.
2. In the NetBeans IDE, choose File => New Project…

3. In the New Project box, on the Categories => Java with Maven, on Projects => Java Application

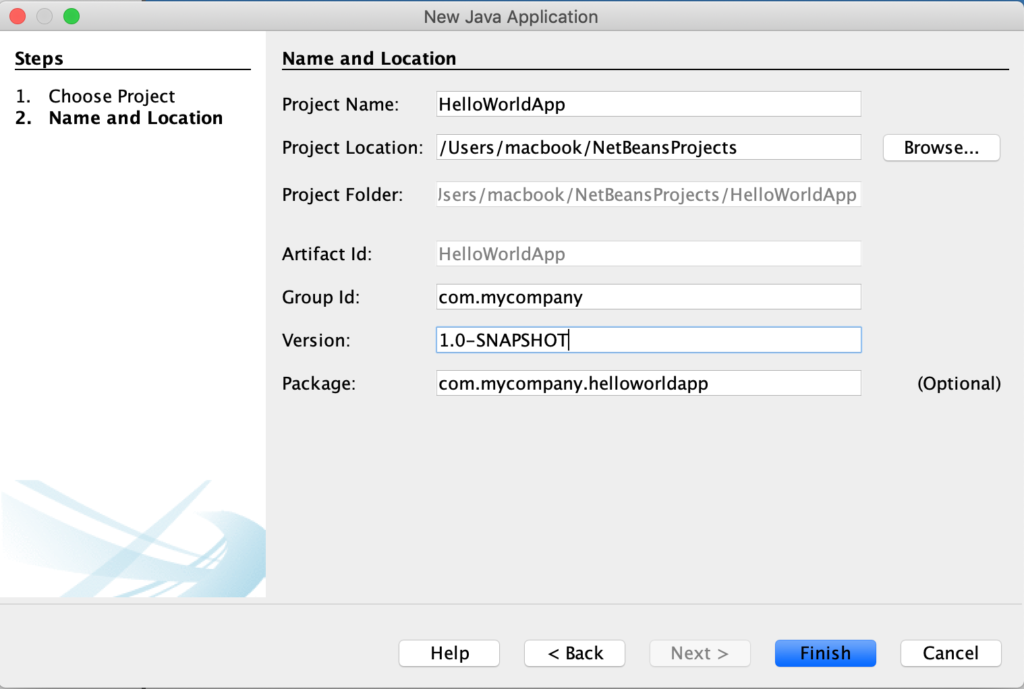
4. In the Name and Location wizard, choose your Project Name and its location then press Finish button
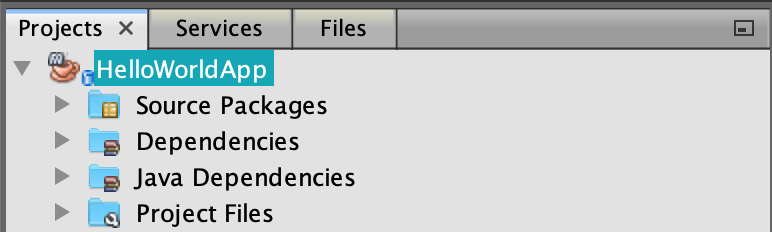
In the Projects window, now you should see the HelloWorldApp project which contains a tree view of the components of the project, including source files, libraries that your code depends on, and so on.
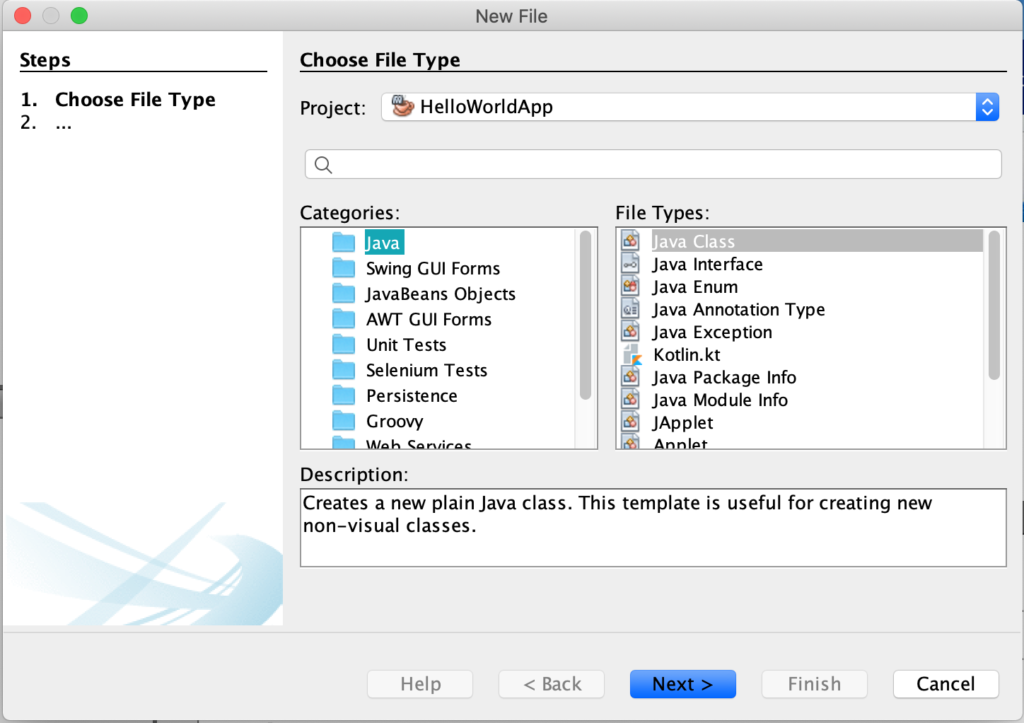
5. Inside the Source Package, click on New File Button and do the following things
Project is the HelloWorldApp project, on Categories section, choose Java, and File Types choose Java Class then press Next.
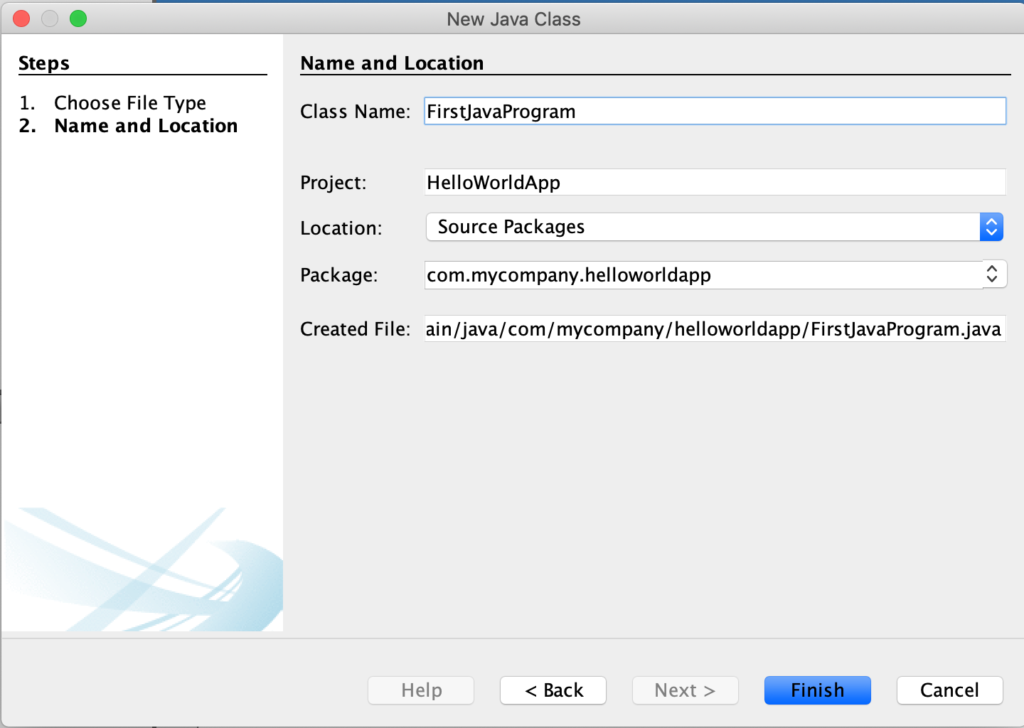
Then a new window will appear, in which you will define your file and also its location. The name of your class should be the same with public class name, in this case, it is FirstJavaProgram and location is Source Package then press Finish.
6. Write your Java Program
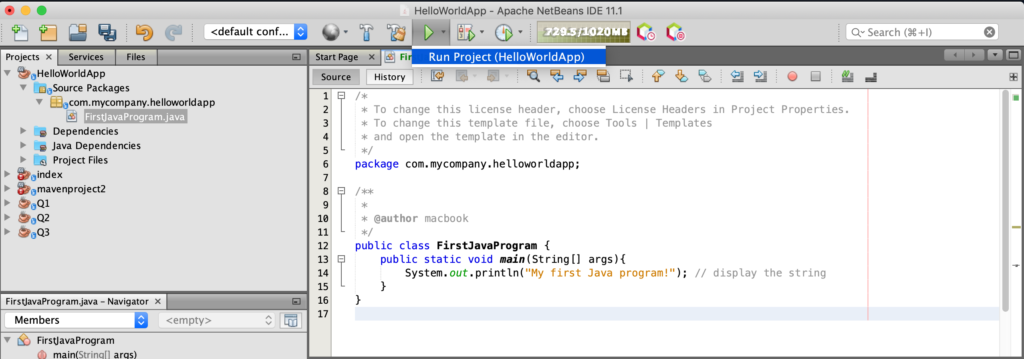
For now, the file named FirstJavaProgram.java has been created inside your Source Package, write the following line of codes inside your new file:
public static void main(String[] args){
        System.out.println("My first Java program!"); // display the string
}

7. Run your Java Program
Click on the Run Project button:
Select the main class, which is this one we’ve just written and click Select Main Class.
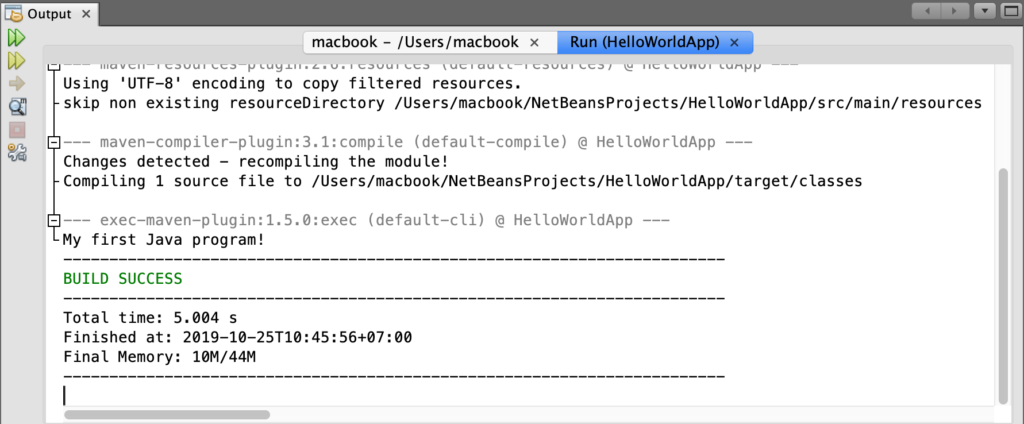
Then, click to the Run Project button again, now you should see the program run and print out something in the output window, in our case is the text ‘My first Java Program!‘:
Now everything is all set, your NetBeans IDE now can compile your Java program and display the output. But if you see some errors while trying to run this project because it is maybe necessary to add JDK to the IDE’s list of available platforms. From the menu on the top choose Tools => Java Platforms. JDK is already in my NetBeans IDE:
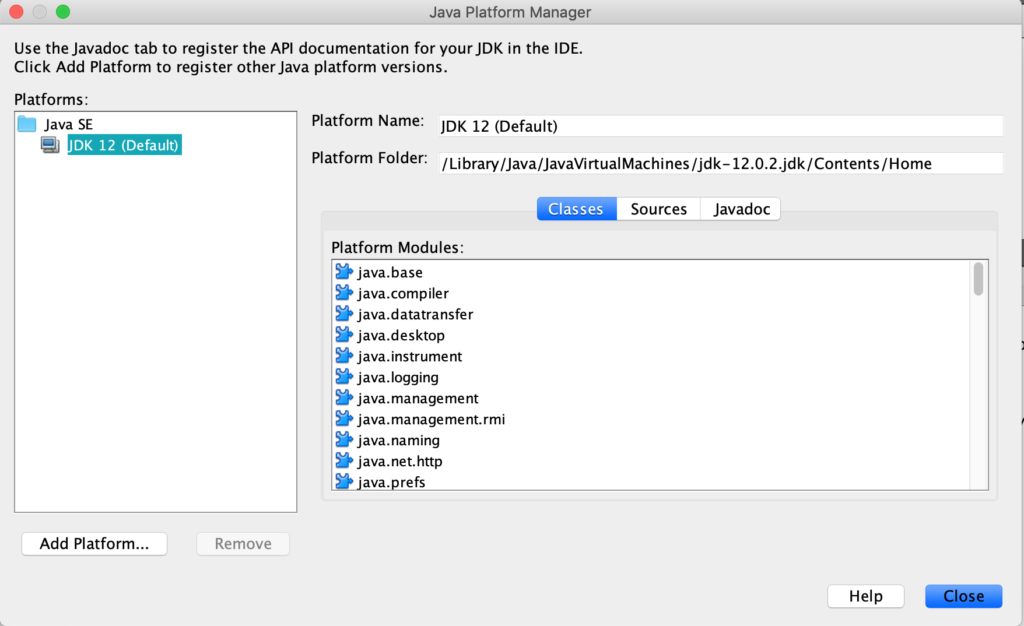
If you don’t see JDK in the list of installed platforms, click Add Platform, navigate to your JDK install directory, and click Finish.
NOTE: If you run Java Program in VS Code with Code Runner extension, remember that the output is the read-only mode that you cannot type something into test such as input the age, name or something in the keyboard. So, if you want to work with input from the keyboard you should use either Language Support for Java(TM) by Red Hat, or IDE or your terminal.
